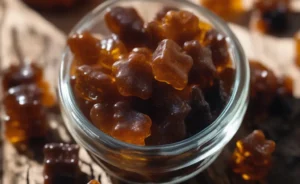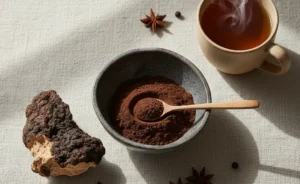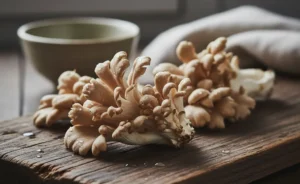
Chaga mushroom growing presents a unique opportunity for cultivating a valuable medicinal fungus that thrives in specific environmental conditions. Unlike many common mushrooms, chaga grows on the bark of living trees, primarily birch, requiring a distinct approach that combines knowledge of forestry and fungal biology. Understanding the intricacies of suitable host trees, climate preferences, and the inoculation process is essential for anyone interested in successfully growing chaga. This comprehensive guide covers everything from selecting the right trees and preparing inoculation sites to maintaining the grow site and harvesting the mature fungus. Whether you are a hobbyist or a commercial cultivator, this resource offers practical insights for sustainable and effective chaga cultivation.
Introduction to Chaga Mushroom Growing
Can chaga grow on any tree? Identifying suitable host species
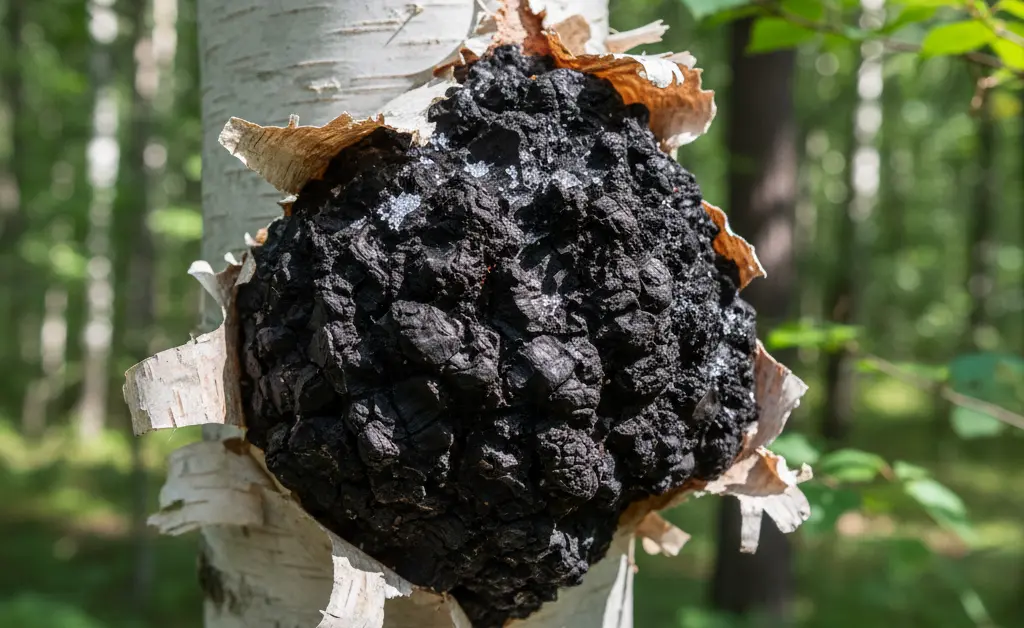
Chaga mushroom, or Inonotus obliquus, is quite selective about its home. It does not grow on just any tree. Its primary and most well-known host is the birch tree (Betula species). The unique relationship between chaga and birch is responsible for the formation of some of the compounds the fungus is known for. While chaga has been occasionally found on other hardwoods such as alder, elm, and hornbeam, these instances are far less common. For successful cultivation, focusing on birch trees—like paper birch, yellow birch, and white birch—is crucial, as they provide the ideal environment and nutrients for the fungus to thrive and develop its characteristic dark, dense sclerotium, or conk.
Ideal climate and environmental conditions for chaga development
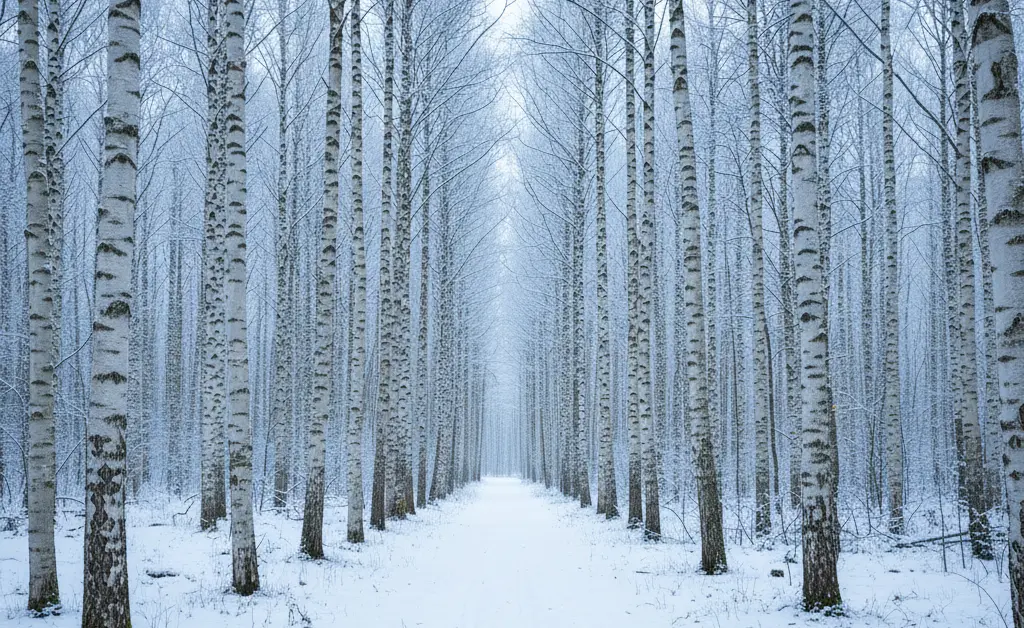
Chaga is a creature of the cold. It flourishes in boreal forests and circumpolar climates, regions known for their long, harsh winters. These cold conditions are not just a preference but a necessary stressor that is believed to contribute to the development of the dense, nutrient-rich conk. The fungus is most commonly found in the northern regions of the United States, Canada, Russia, Northern Europe, and Korea. An environment with significant temperature fluctuations between seasons, particularly with deep freezes in winter, provides the ideal setting for chaga to establish and mature over many years. Understanding the ideal chaga mushroom habitat is key to successful cultivation.
Chaga mushroom growing temperature requirements
The growth of chaga is intrinsically linked to cold temperatures. The fungus requires a climate where winter temperatures drop and remain well below freezing for extended periods. This prolonged cold stress is a key trigger for the formation of the sclerotium, the black, woody mass seen on the outside of the tree. While the mycelium can survive warmer periods, the development of the harvestable conk is dependent on the harshness of the cold season. This is why chaga cultivation is best suited for northern latitudes and is not a viable option in temperate or tropical climates.
Grow Chaga on live birch trees and manage the forest for sustainable harvesting
A critical point to understand is that chaga is a parasitic fungus that grows exclusively on living trees. It cannot be cultivated on dead logs or stumps like many other types of mushrooms. The fungus establishes a long-term relationship with its living host, drawing nutrients from the tree over many years. This makes sustainable forest management an integral part of chaga cultivation. Successful growers must act as stewards of the forest, selecting healthy, mature birch trees for inoculation and managing the surrounding woodland to ensure its long-term health and vitality. The presence of chaga mushroom on a birch tree indicates a long-term parasitic relationship that requires careful management.
Chaga Inoculation: Step-by-Step Process and Essential Tools
Selecting quality chaga spawn or liquid culture
The foundation of successful cultivation is high-quality genetics. Chaga spawn consists of mycelium, the vegetative part of the fungus, grown on a carrier substrate like sawdust or grain. Alternatively, liquid culture contains mycelium suspended in a nutrient broth. It is essential to source spawn or liquid culture from a reputable supplier to ensure you are working with a vigorous and pure strain of Inonotus obliquus. A reliable source will provide a contaminant-free product, giving your inoculation the best possible chance of success.
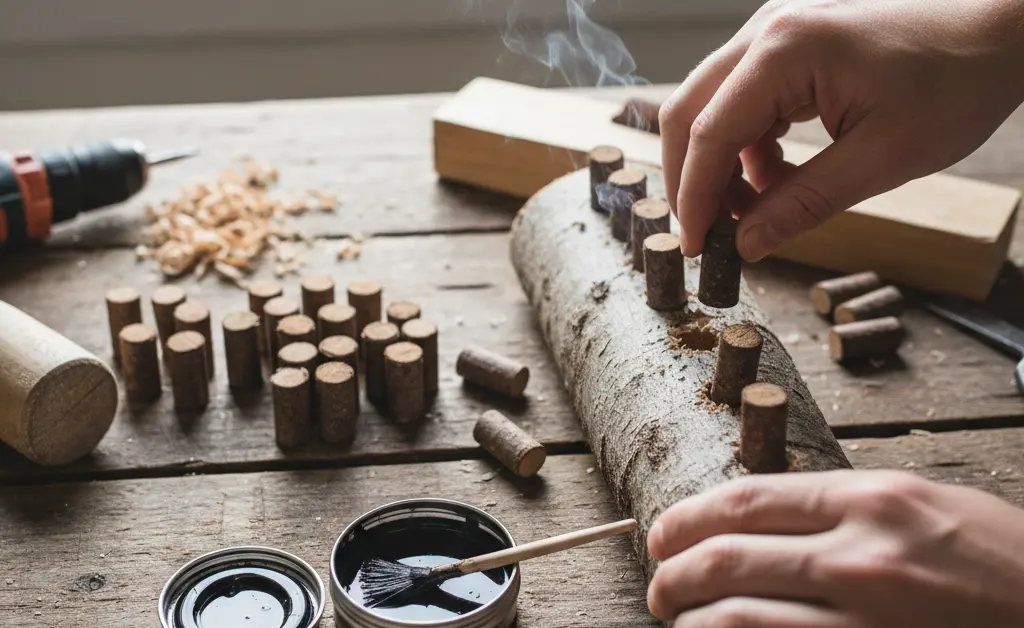
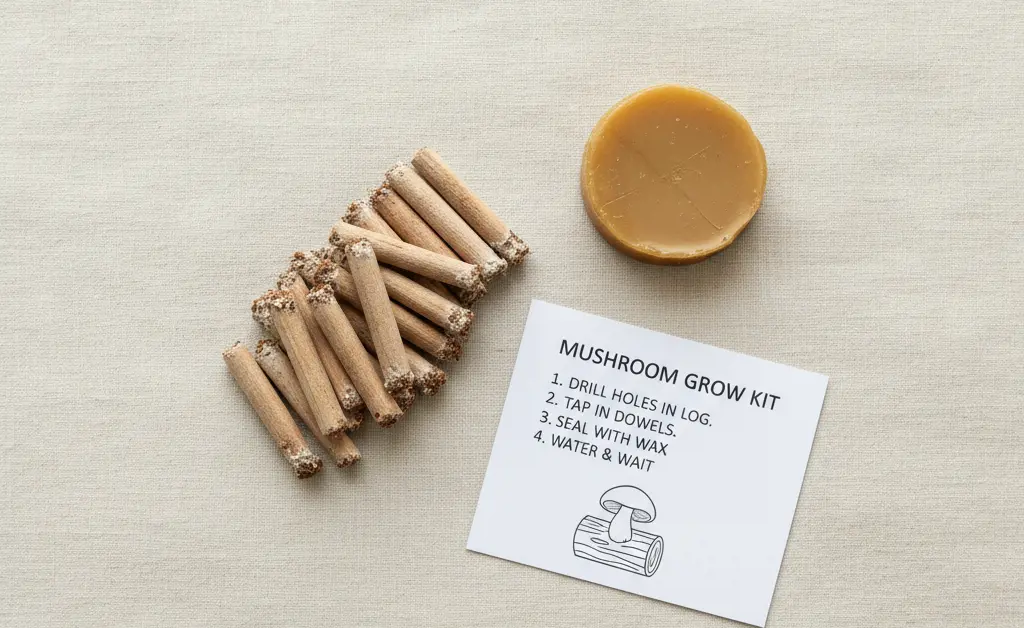
Chaga plugs and dowels for inoculation
One of the most common and effective methods for introducing chaga to a host tree is through the use of inoculation plugs or dowels. These are small, spiral-grooved wooden dowels that have been fully colonized with chaga mycelium. The dowels act as a delivery vehicle, allowing the mycelium to be inserted directly into the tree’s cambium layer, where it can begin to establish itself. The wood of the dowel provides an initial food source and protects the mycelium as it transitions into its new host.
Essential equipment for tree inoculation
The inoculation process requires a few specific tools to be done correctly and safely. The basic toolkit includes a power drill, a drill bit sized to match the diameter of your inoculation plugs, a hammer or rubber mallet for tapping the plugs into place, and a type of sealing wax, such as beeswax or food-grade cheese wax. It is also wise to have a cleaning agent to sterilize the drill bit between trees to prevent the spread of other potential tree diseases.
Preparing the host tree for inoculation
Selection of the right host tree is paramount. Look for a healthy, mature birch tree with a substantial trunk diameter. Avoid trees that show signs of disease, significant damage, or stress. Once a suitable tree is identified, choose inoculation sites on the trunk. It’s best to spread the sites out around the tree rather than concentrating them in one area. The ideal location is often where a branch once grew or in an area with thick bark, avoiding any existing wounds or cankers.
Techniques for introducing chaga spawn into host trees
The technique for inoculating a tree is straightforward but requires care. First, drill holes into the trunk to a depth that is slightly deeper than the length of the plug. The holes should be angled slightly upwards to prevent water from pooling inside. Next, insert a chaga plug into each hole. Use a hammer or mallet to gently tap the plug until it is flush with the tree’s bark. Be careful not to damage the bark around the hole during this process. The goal of this phase of **chaga mushroom growing** is to create a secure and protected entry point for the mycelium.
Sealing and protecting inoculation sites
After all the plugs are inserted, the final and most critical step is to seal each inoculation site with wax. Carefully melt the wax and apply it over the end of each plug, creating a complete barrier. This seal serves multiple purposes: it protects the chaga mycelium from drying out, prevents contamination from competing fungi or bacteria, and deters insects from entering the inoculation holes. A proper seal is vital for giving the chaga a secure environment to begin its long process of colonization.
Maintaining Your Chaga Grow Site
Monitoring tree health and chaga colonization
After inoculation, the process becomes a waiting game that requires patience. It is important to periodically visit your grow site to monitor the overall health of the host trees. A healthy tree will better support the fungal growth. Signs of chaga colonization are not immediate and can take a year or more to become apparent. The mycelium works internally long before any external growth is visible. Check for the general well-being of the tree, such as healthy leaf cover in season and intact bark.
Protecting against pests and environmental stressors
The sealed inoculation sites are the most vulnerable points. Inspect the wax seals to ensure they are intact and have not been disturbed by wildlife, such as birds or squirrels, or damaged by weather. A compromised seal can expose the mycelium to competitors and pests. Additionally, be mindful of environmental stressors like prolonged drought, which can weaken the host tree. A healthy, well-managed forest environment is the best defense against many of these potential issues.
Addressing common challenges in chaga cultivation
One of the biggest challenges in **chaga mushroom growing** is the slow pace of development. It is easy to become discouraged when no growth is visible for years. Sometimes, an inoculation may fail to take hold due to factors like poor spawn quality, an unhealthy host tree, or improper technique. Another challenge can be competition from other, more aggressive fungi. Careful site selection and meticulous sterile procedure during inoculation are the best ways to mitigate these risks. Patience and realistic expectations are essential for any aspiring chaga cultivator.
Chaga Mushroom Growing Timeline and Expectations
Factors influencing chaga growth rate
The timeline for chaga development is exceptionally long and varies widely based on several factors. The health, age, and species of the host birch tree play a significant role. A vigorous, mature tree in its prime will support faster colonization. Climate is another critical factor; the consistent cold stress of northern winters is necessary for the formation of the conk. The quality and vigor of the chaga spawn used for inoculation also have a direct impact. Even under ideal conditions, it can take several years for the first signs of external growth to appear, and many more years for a harvestable conk to form.
Recognizing signs of successful chaga development
The first external sign of a successful inoculation is often a slight swelling or discoloration of the bark around the inoculation site. This can take a considerable amount of time to appear. As the fungus establishes itself and begins to form the sclerotium, a small, dark protrusion will emerge from the tree. This is the beginning of the chaga conk. Over the following years, this growth will slowly expand, developing its characteristic cracked, charcoal-like appearance. A healthy, growing conk will feel hard and dense to the touch.
Harvesting Cultivated Chaga Mushrooms
Determining the optimal time for chaga harvest
Patience is key not only for growth but also for harvesting. Chaga should only be harvested after it has reached a substantial size, which can take many years—often a decade or more from the time of inoculation. Harvesting too early yields very little material and can damage the long-term potential of the site. A mature conk will be large, dense, and deeply blackened. The best practice is to wait until the chaga is well-established before considering a harvest.
Proper harvesting techniques to preserve tree health
Sustainable harvesting is crucial for both the health of the host tree and the continuation of the fungal growth. Never remove the entire chaga conk. Using a sharp tool like a hatchet or a sturdy knife, carefully break off only a portion of the outer growth. It is recommended to leave at least one-third of the chaga mass attached to the tree. Crucially, do not cut into the wood of the tree itself, as this creates a deep wound that can expose the tree to other infections. The goal of a proper harvest in **chaga mushroom growing** is to take a share without killing the host or the fungus.
Post-harvest considerations for future growth
By leaving a portion of the chaga on the tree, you allow the fungus to recover and continue to grow. The remaining sclerotium acts as a protective layer over the area and can regrow over time, potentially allowing for another sustainable harvest years down the line. This ethical approach ensures that the relationship between the fungus and the tree can continue, supporting the long-term health of your chaga grow site.
Chaga Mushroom Growing Kits and Alternative Methods
Understanding the pros and cons of chaga growing kits
For those new to the process, **chaga mushroom growing** kits can be a convenient entry point. These kits typically provide chaga-inoculated dowels and sealing wax, removing the need to source these items separately. The main advantage is convenience and accessibility. However, the cons are similar to sourcing any spawn: the quality and viability of the mycelium can vary. Furthermore, a kit does not change the fundamental requirements for chaga cultivation—you still need access to healthy, living birch trees in an appropriate cold climate, and you must be prepared for the multi-year wait for any results.
Cultivating Chaga Mushrooms in the Lab: Techniques and Future Prospects
Beyond inoculating trees, it is possible to cultivate chaga mycelium in a controlled laboratory setting. This is a form of fungiculture where the mycelium is grown in sterile liquid broths or on solid substrates like sterilized grain. This method allows for the rapid production of pure mycelial biomass, free from environmental contaminants. However, it’s important to note that lab-grown mycelium does not form the characteristic black sclerotium, or conk. The unique compounds found in wild or tree-cultivated chaga are formed as a result of the fungus’s interaction with the living birch tree and environmental stressors. Lab cultivation is an area of ongoing scientific research, exploring ways to replicate these valuable properties outside of the forest. Numerous studies on this topic are available through resources like PubMed.
Ultimately, the practice of chaga mushroom growing is a long-term investment in nature. It requires a deep understanding of forest ecology, a commitment to sustainable practices, and a great deal of patience. Unlike cultivating fast-growing garden vegetables or common mushrooms, growing chaga is about fostering a slow, symbiotic relationship between a fungus and its host tree over the course of years, or even decades. The rewards are not immediate but are rooted in a sustainable connection to the natural world and the unique fungus it can produce.
FAQ
— How long does it take to grow chaga mushrooms?
Chaga mushrooms typically develop over several years, often requiring a lengthy period before visible growth appears. The growth rate is influenced by environmental conditions and the host tree’s health.
— What type of tree is best for growing chaga?
Chaga is most commonly found growing on birch trees, which provide the ideal nutrients and environment for its development. Other hardwoods may host chaga, but birch is traditionally referenced as the preferred species.
— Can chaga be grown at home or indoors?
Growing chaga indoors is generally challenging due to its specific environmental needs and the natural interaction with live trees. Home cultivation attempts often focus on outdoor settings where host trees are accessible.
— What is the easiest way to inoculate a tree with chaga?
Inoculation usually involves introducing chaga spawn or mycelium into a living birch tree through carefully made wounds. This method allows the fungus to colonize the tree over time, although success rates can vary.
— Do you need special equipment to cultivate chaga?
While cultivating chaga does not necessarily require highly specialized equipment, tools for safely creating inoculation sites and maintaining tree health are often necessary. Proper care and monitoring tools can enhance cultivation outcomes.
— When should you harvest cultivated chaga mushrooms?
Harvesting is often done when the chaga conk reaches maturity and displays a solid, dark exterior, which may take several years. Timing depends on growth progress and the desired quality of the mushroom.
— What are the signs of a successful chaga inoculation?
Successful inoculation may be indicated by the formation of a hard, blackened mass on the tree bark, signaling fungal colonization. However, visual confirmation can take time, and monitoring is essential to assess development.
— Can chaga mushrooms be grown on dead trees?
Chaga traditionally grows on living birch trees, as it requires the host’s nutrients to develop. Growing it on dead trees is uncommon and generally not considered effective for cultivation.