In an era where health-conscious living and sustainable practices are increasingly valued, cultivating one’s own food has become a rewarding endeavor. Maitake mushrooms, revered for their distinct flavor and impressive health benefits, offer an excellent opportunity for home growers and aspiring cultivators alike. Their rich, earthy taste makes them a prized ingredient in gourmet cooking, while their adaptogenic properties contribute to overall wellness. This guide delves into the intricate yet accessible world of maitake mushroom farming, providing comprehensive steps from understanding their biology to successful harvesting. Whether you aim to enhance your culinary creations or embrace a more self-sufficient lifestyle, mastering the art of growing these unique fungi can be a deeply satisfying experience. Join us as we explore the journey of bringing these magnificent mushrooms from spore to plate.
Maitake Mushroom Farming: A Complete Guide
Embarking on the journey of maitake mushroom farming offers both a culinary delight and a potential source of income. This comprehensive guide aims to equip enthusiasts and commercial growers with the knowledge needed to successfully cultivate these prized fungi, also known as Hen of the Woods or Grifola frondosa. From understanding their unique biological needs to implementing advanced cultivation techniques, we cover every aspect of the process. Successful mushroom farming hinges on meticulous attention to detail and creating an environment that mimics the maitake’s natural habitat. This involves careful control over factors like substrate composition, temperature, humidity, and airflow, ensuring robust growth and bountiful harvests. A solid understanding of how to grow maitake mushroom from the start will set you up for success.
Understanding Maitake Mushrooms: Biology and Cultivation Basics
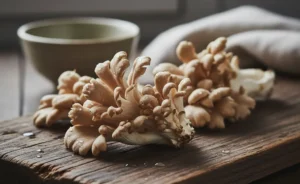
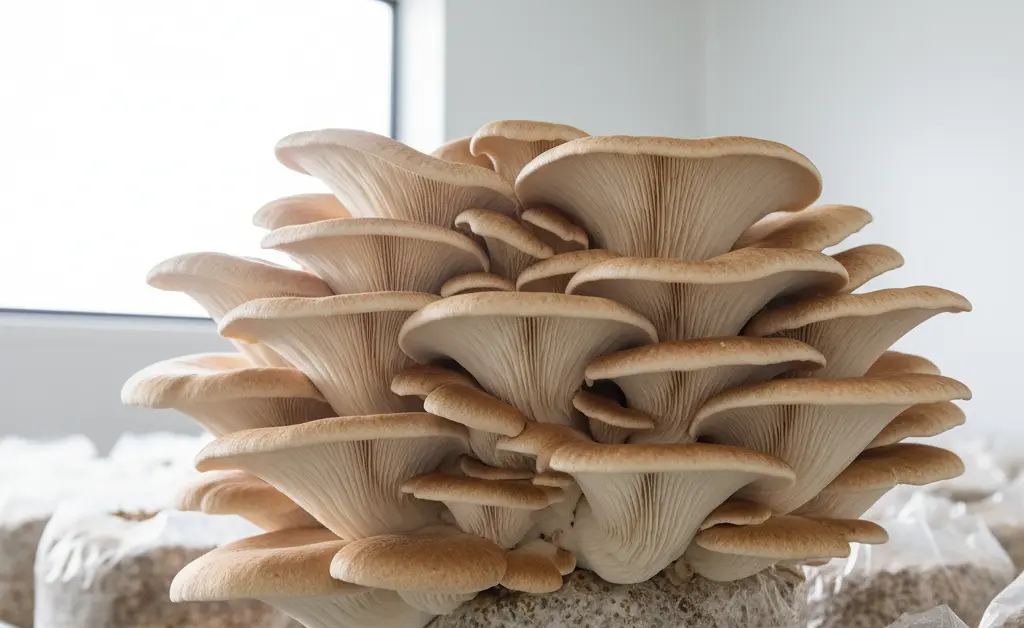
Maitake mushrooms are saprophytic fungi, meaning they obtain nutrients from dead organic matter, typically hardwood trees in their natural environment. Understanding their biological needs is foundational to successful cultivation. They are known for their distinct, wavy, fan-like caps that often grow in a cluster at the base of trees.
An Overview of the Maitake Growth Cycle
The growth cycle of Maitake mushrooms begins with spores, which germinate to form a network of fine white threads called mycelium. This mycelium colonizes a suitable substrate, breaking down complex organic compounds. Once the mycelium has fully established itself and accumulated sufficient energy, it enters the fruiting stage, where small primordia (pins) begin to form. These pins develop into mature fruiting bodies, which are the mushrooms we harvest. The entire process, from inoculation to harvest, can vary in length depending on the specific strain and environmental conditions, but generally follows predictable stages of colonization, pinning, and maturation.
Choosing the Right Maitake Spawn (Plugs, Sawdust, Grain)
Selecting the appropriate spawn type is a critical first step in maitake cultivation. Each type offers distinct advantages depending on the chosen growing method:
- Plug Spawn: These are small wooden dowels colonized with maitake mycelium, ideal for outdoor log cultivation. They are durable and designed to be inserted into drilled holes in hardwood logs.
- Sawdust Spawn: Mycelium grown on sterilized sawdust, often used for inoculating larger quantities of bulk substrate or for outdoor beds. It offers more points of inoculation compared to plug spawn, potentially leading to faster colonization.
- Grain Spawn: Mycelium grown on sterilized grains like rye or millet. Grain spawn is highly vigorous and often used to inoculate sterilized substrate blocks for indoor growing due to its rapid colonization rate and high nutrient content. For cultivators looking for even faster colonization, using a maitake mushroom liquid culture to inoculate grain can be an effective technique.
The choice largely depends on whether you plan to grow on logs outdoors or in substrate blocks indoors.
Selecting a Suitable Substrate: Logs vs. Supplemented Sawdust
The substrate provides the necessary nutrients and structure for the mycelium to grow and produce mushrooms. Maitake mushrooms thrive on lignin-rich materials. The two primary options are:
- Hardwood Logs: A traditional and highly effective method for outdoor cultivation. Oak, maple, elm, and beech are preferred hardwoods. Logs provide a natural, long-term growing medium that can produce mushrooms for several years once fully colonized. This method mimics the natural growth habit of Grifola frondosa.
- Supplemented Sawdust: Primarily used for indoor cultivation. This substrate typically consists of hardwood sawdust (oak, maple) mixed with nutritional supplements like wheat bran, soy hulls, or gypsum. This mix is pasteurized or sterilized to eliminate contaminants, creating a nutrient-rich and controlled environment for rapid indoor growth.
Each substrate choice dictates different preparation, inoculation, and environmental management strategies.
Essential Equipment and Supplies for Maitake Cultivation
Successful maitake cultivation requires a specific set of tools and materials. Having the right supplies on hand ensures a smoother process and increases the chances of a successful harvest, whether you are engaging in small-scale or more extensive mushroom farming operations.
Required Tools and Equipment
Depending on your chosen cultivation method (logs or indoor blocks), your essential tools will vary. For log cultivation, you will need a drill with an appropriate bit size for your plug spawn, a hammer or mallet, and wax or sealant to cover inoculation sites. For indoor substrate block cultivation, essential equipment includes a pressure cooker or sterilizer for substrate preparation, heat-sealable grow bags, an inoculation loop or sterile gloves, and potentially a flow hood or still air box to maintain sterility during inoculation. A reliable thermometer and hygrometer are crucial for monitoring environmental conditions in both setups.
Maitake Mushroom Spawn
The quality of your maitake mushroom spawn is paramount. Always source spawn from reputable suppliers to ensure it is viable, contaminant-free, and of the correct strain. Good spawn will display strong, healthy mycelial growth, typically appearing as a robust white mass. It should not show any signs of green, black, or unusual colors, which indicate contamination. The type of spawn chosen—plug, sawdust, or grain—must be compatible with your intended cultivation method.
Maitake Mushroom Growing Kits: What to Look For
For beginners, maitake mushroom growing kits can offer a convenient entry point. These kits typically come with an already inoculated substrate block and clear instructions, simplifying the initial stages of cultivation. When selecting a kit, look for:
- Reputable Brand: Choose kits from established growers known for quality.
- Substrate Type: Ensure the substrate is appropriate for maitake (usually supplemented hardwood sawdust).
- Freshness: Check the “use by” date or production date to ensure the mycelium is still active and healthy.
- Clear Instructions: Good kits provide easy-to-follow guidance for optimal fruiting.
- Customer Support: A company that offers support can be invaluable if you encounter issues.
While kits are user-friendly, understanding the underlying principles of mushroom cultivation will enhance your overall experience and success.
Cultivating Maitake on Hardwood Logs
Cultivating maitake on hardwood logs is a time-honored method that mimics the mushroom’s natural growth environment. This outdoor maitake mushroom farming approach often yields robust, flavorful mushrooms and can continue producing for several years once the logs are fully colonized.
Sourcing and Preparing Your Logs
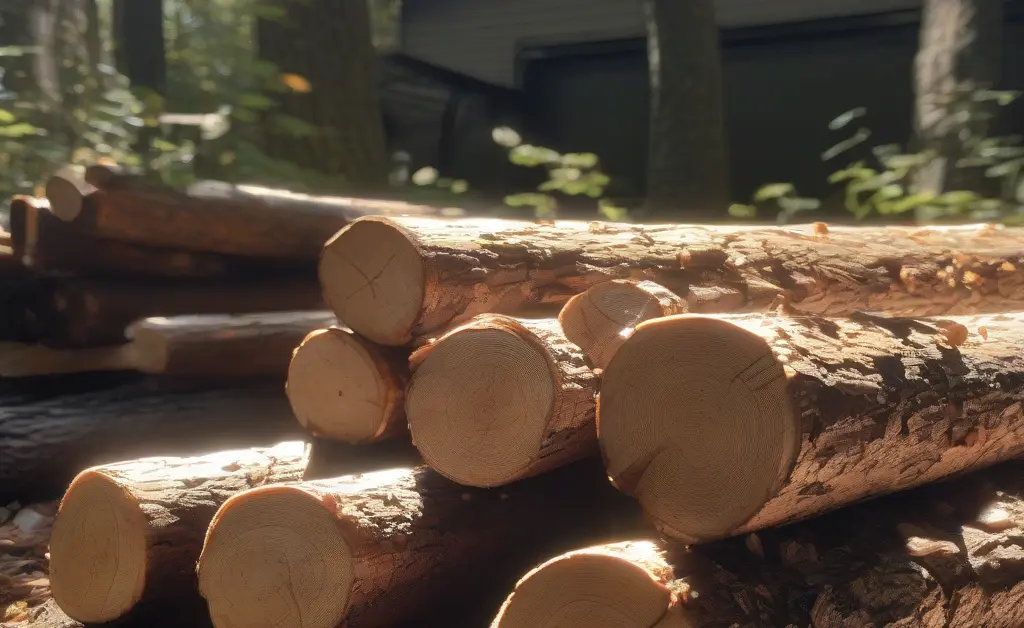
The success of log cultivation begins with the right wood. Opt for freshly cut hardwood logs from species like oak, maple, elm, or beech, ideally harvested within a few weeks of inoculation. Logs should be 3-6 inches in diameter and 3-4 feet long, free from disease or mold. After cutting, allow the logs to “rest” for a few weeks to reabsorb moisture and for natural anti-fungal compounds in the wood to dissipate, making them more hospitable for the maitake mycelium.
The Inoculation Process for Logs
Inoculation involves introducing the maitake spawn into the prepared logs. Using a drill, create a series of holes (approximately 1 inch deep and 4-6 inches apart in a diamond pattern) around the log. Insert plug spawn into these holes, gently tapping them flush with the log surface. After insertion, seal each inoculated hole with melted wax (food-grade cheese wax or beeswax) to protect the mycelium from contaminants and retain moisture. This step is crucial for the successful establishment of the mycelium.
Incubation: Colonizing the Logs
Once inoculated, the logs enter the incubation period, where the maitake mycelium colonizes the wood. Stack the inoculated logs in a shady, protected outdoor area, ensuring good air circulation but protection from direct sun and wind. Maintain consistent moisture by periodic watering, especially during dry spells. This colonization phase can take 6-18 months, depending on the wood type, environmental conditions, and spawn vigor. Patience is key during this stage, as the mycelium silently spreads throughout the log.
Initiating Fruiting and Environmental Conditions on Logs
After the logs are fully colonized, you can encourage fruiting by providing specific environmental cues. Often, a cool shock from autumn rains or moving logs to a more humid area can trigger pinning. Maitake mushrooms prefer cooler temperatures (around 50-65°F or 10-18°C) and high humidity (70-90%) for fruiting. While less controllable than indoor settings, selecting an appropriate, moist, and shady location for your outdoor maitake mushroom farming logs will optimize fruiting conditions. Once fruiting begins, ensure consistent moisture to help the developing mushrooms mature. Mastering the ideal maitake mushroom growing conditions is key to a successful log cultivation.
Growing Maitake Indoors with Substrate Blocks
Indoor cultivation of maitake mushrooms offers greater control over environmental conditions, potentially leading to more consistent and predictable yields. This method typically uses supplemented sawdust blocks or grow bags as the substrate.
Preparing and Sterilizing the Substrate Mix
The substrate mix for indoor maitake typically consists of hardwood sawdust (oak, maple, or a blend) supplemented with nutrient-rich additions like wheat bran, soy hulls, or rice bran, and sometimes gypsum for mineral balance. The exact ratio can vary, but a common starting point is 80% sawdust to 20% supplements by dry weight. Once mixed, the substrate is packed into heat-resistant grow bags or containers. Sterilization is critical to eliminate competing microorganisms; this is usually achieved by cooking the sealed bags in a pressure cooker or autoclave at a high temperature and pressure for a specific duration, typically 90-120 minutes at 15 PSI.
Inoculating Grow Bags or Blocks
After sterilization, the substrate bags must cool completely to room temperature before inoculation. This process should be performed in a sterile environment, such as in front of a HEPA-filtered flow hood or inside a still air box, to minimize the risk of contamination. Open the cooled bags and introduce the maitake grain or sawdust spawn, thoroughly mixing it into the substrate. Reseal the bags, often with a micro-filter patch that allows for gas exchange while preventing contaminants from entering.
Managing Colonization and Incubation for Substrate Blocks
Once inoculated, the substrate blocks enter the colonization phase. Place the grow bags in a clean, dark area with a consistent temperature, ideally around 70-75°F (21-24°C). During this period, the maitake mycelium will spread throughout the substrate, consuming nutrients and binding the sawdust together into a solid block. This process can take 3-6 weeks, and you will observe the block gradually turning white as the mycelium takes over. Ensure good air circulation around the blocks to prevent heat buildup and maintain healthy mycelial growth. This stage is crucial for strong indoor maitake mushroom farming.
Creating an Optimal Fruiting Chamber Environment
After full colonization, the blocks are ready for the fruiting chamber. This chamber needs precise control over temperature, humidity, and fresh air exchange. Maitake prefers cooler temperatures (50-65°F or 10-18°C), high humidity (85-95%), and consistent fresh air to trigger and sustain fruiting. Implement humidifiers, fans, and ventilation systems to maintain these conditions. Indirect lighting can also be beneficial, providing a photoperiod to encourage uniform growth.
Fruiting Maitake Mushroom Blocks
To initiate fruiting, expose the fully colonized blocks to the fruiting chamber conditions. This often involves cutting small slits or removing sections of the plastic bag to allow the primordia (pins) to form. Small, knot-like structures will begin to appear, which will then develop into the characteristic maitake clusters. Maintain consistent humidity and fresh air exchange throughout the fruiting period. The mushrooms will expand rapidly, with multiple flushes possible from a single block, offering continuous harvests in a controlled indoor environment.
Harvesting and Storing Maitake Mushrooms
Proper harvesting and storage techniques are crucial for maximizing the yield and preserving the quality of your home-grown maitake mushrooms.
Identifying the Perfect Time to Harvest
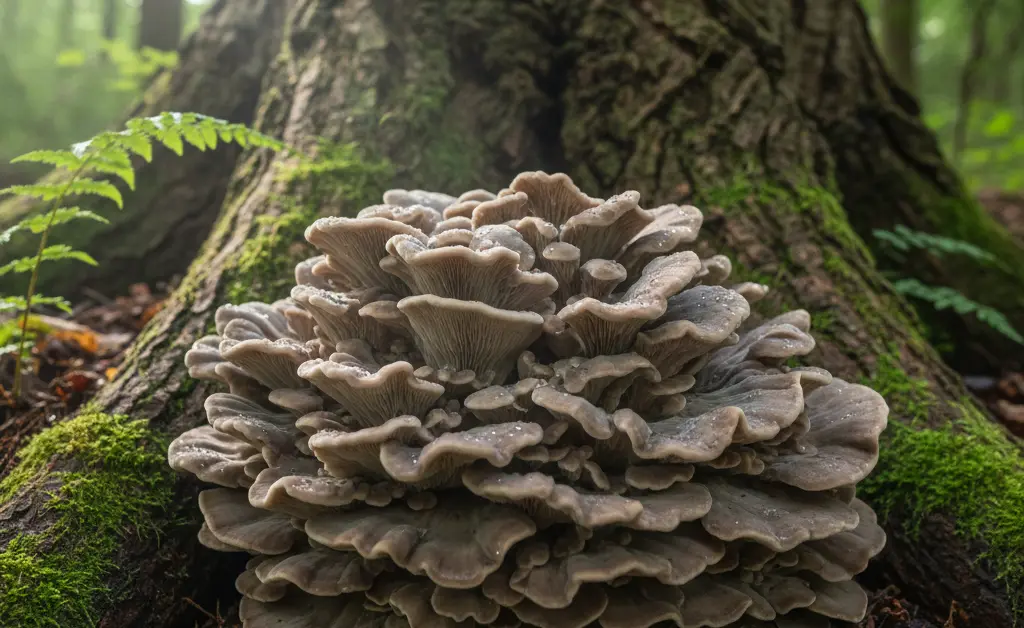
Maitake mushrooms are ready for harvest when their caps are fully developed, fan-shaped, and the edges are still relatively smooth, not brittle. The cluster should be substantial but still firm. Avoid harvesting when the edges start to curl significantly upwards or become too soft, as this indicates over-maturity and may reduce flavor and texture. Observe the size and overall structure; maitake often grows in impressive clusters, and harvesting the entire cluster at once is common.
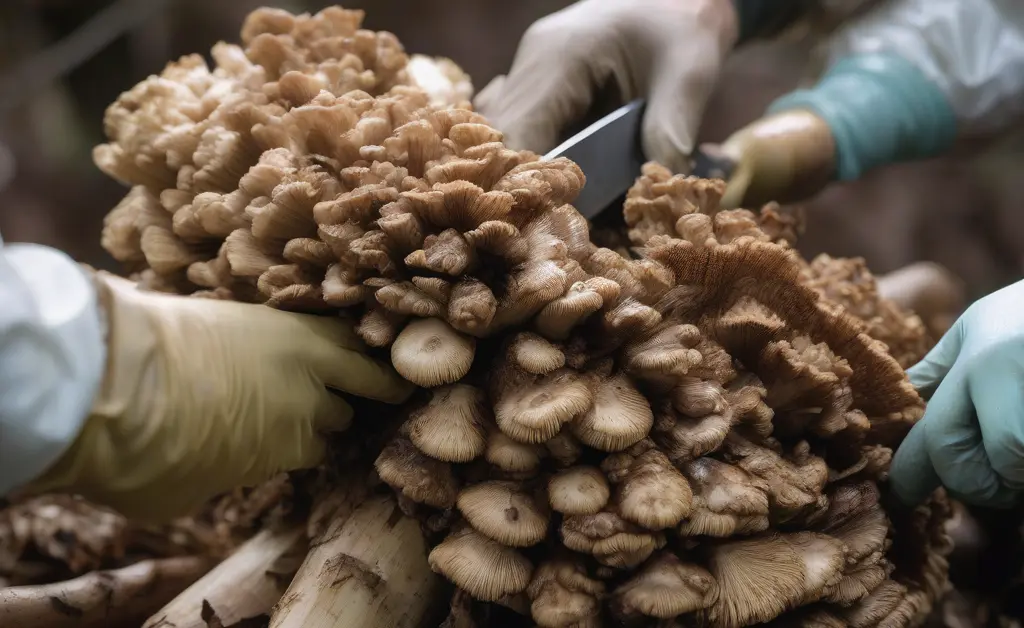
Proper Harvesting Techniques
To harvest maitake, use a clean, sharp knife to cut the entire cluster at its base, as close to the substrate or log as possible. Avoid pulling or twisting, which can damage the underlying mycelium and hinder future flushes. Handle the mushrooms gently to prevent bruising. After harvesting, clean any substrate debris from the base of the cluster immediately with a brush or cloth, avoiding water if possible, to prepare them for storage or immediate use.
Post-Harvest Handling and Storage
Fresh maitake mushrooms are best consumed shortly after harvest. For short-term storage, place them in a paper bag in the refrigerator; this allows them to breathe and prevents them from becoming slimy, typically extending their freshness for up to a week. Avoid storing them in plastic bags, which trap moisture and accelerate spoilage. For longer preservation, consider drying or freezing, which will be discussed in subsequent sections.
Troubleshooting Common Challenges in Maitake Farming
Even with careful planning, cultivators may encounter issues during maitake mushroom farming. Understanding common problems and their solutions is vital for maintaining a healthy grow and ensuring a successful harvest.
Preventing Contamination
Contamination by molds, bacteria, or other fungi is one of the most significant challenges in mushroom cultivation. Prevention is always easier than cure. Key strategies include:
- Sterilization/Pasteurization: Thoroughly sterilize (for indoor blocks) or pasteurize (for less intensive outdoor methods) all substrates.
- Sterile Environment: Perform inoculation in a clean, still air box or in front of a flow hood.
- Clean Tools: Sanitize all tools and surfaces with alcohol or bleach solution.
- Healthy Spawn: Use only vigorous, contaminant-free spawn from a reputable source.
- Clean Air: Ensure good air filtration and ventilation in your growing area.
If contamination is observed, isolate the affected block or log immediately to prevent spread.
Troubleshooting Poor Mycelial Growth
If your maitake mycelium is growing slowly, sparsely, or not at all, consider these factors:
- Temperature: Ensure the incubation temperature is within the optimal range (e.g., 70-75°F or 21-24°C for indoor blocks).
- Moisture: The substrate should be adequately hydrated but not waterlogged. Too dry or too wet can inhibit growth.
- Nutrition: Check if the substrate formula has sufficient nutrients for robust growth.
- Spawn Quality: Weak or old spawn will lead to poor colonization.
- Air Exchange: While colonization typically requires less fresh air, some exchange is still necessary; ensure filter patches on bags are clear.
Addressing Issues with Pinning and Fruiting
Problems with mushrooms failing to pin or develop properly often stem from suboptimal environmental conditions in the fruiting chamber:
- Humidity: Maitake requires very high humidity (85-95%) for pinning and development. If it’s too dry, primordia may abort.
- Fresh Air Exchange (FAE): Insufficient FAE can lead to leggy, deformed mushrooms or prevent pinning altogether. Provide consistent, gentle airflow.
- Temperature: Fruiting temperatures for maitake are typically cooler than colonization temperatures. A ‘cold shock’ can sometimes initiate pinning.
- Light: While not strictly necessary, some indirect light can help orient mushroom growth.
- Substrate Exhaustion: If a block has produced multiple flushes, it may be depleted of nutrients.
Adjusting these environmental parameters can often resolve issues and promote successful maitake mushroom farming yields.
Post-Harvest Processing and Market Considerations
Beyond cultivation, understanding how to process, preserve, and market maitake mushrooms can add significant value to your efforts.
Drying and Packaging Techniques for Longevity
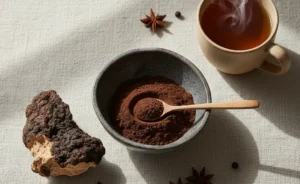
Drying is an excellent method for long-term preservation of maitake. Slice larger clusters into smaller, uniform pieces to facilitate even drying. A food dehydrator is the most efficient tool, set to a low temperature (around 100-120°F or 38-49°C) until the mushrooms are cracker-dry. Air drying in a low-humidity environment is also possible but takes longer. Once thoroughly dried, store the maitake in airtight containers (glass jars or vacuum-sealed bags) in a cool, dark place. Proper packaging protects them from moisture and pests, retaining their flavor and extending their shelf life for many months.
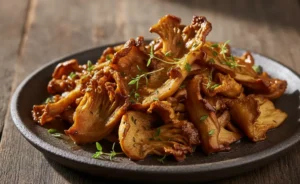
Exploring Culinary Uses and Value-Added Products
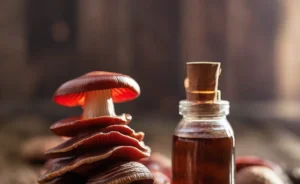
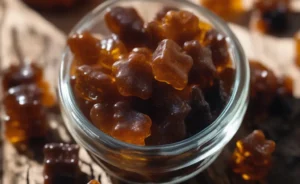
Maitake mushrooms are highly prized in culinary circles for their rich, earthy, and umami flavor. They can be sautéed, roasted, grilled, or added to soups and stir-fries. Beyond fresh consumption, they can be incorporated into value-added products. Dried maitake can be rehydrated and used in cooking, or ground into a powder to be used as a flavorful seasoning or dietary supplement. Tinctures and extracts are also popular health products, leveraging maitake’s adaptogenic properties. Scientific studies available on platforms like PubMed have explored the various bioactive compounds in these mushrooms.
Navigating Local Markets and Sales Channels
For those interested in selling their cultivated maitake, understanding market dynamics is key. Local farmers’ markets are an excellent starting point, offering direct interaction with consumers and allowing you to set your own prices. Restaurants, particularly those specializing in gourmet or health-conscious cuisine, are often keen buyers of fresh, locally grown specialty mushrooms. Online sales through local delivery or farm-to-table programs can also expand your reach. Building relationships with chefs and market managers, and consistently delivering high-quality product, are crucial for success in navigating these sales channels.
Embracing the world of maitake mushroom farming is a venture that combines rewarding hands-on cultivation with the joy of harvesting a gourmet and health-benefiting fungus. From the initial stages of understanding mycelial growth and substrate preparation to the careful processes of inoculation, incubation, and fruiting, each step contributes to the satisfaction of bringing these magnificent mushrooms to fruition. By mastering these techniques and adapting to the specific needs of Grifola frondosa, cultivators can enjoy a sustainable supply of delicious maitake, whether for personal culinary delight or as a thriving commercial endeavor. The journey of maitake mushroom farming is a testament to the intricate wonders of mycology and the rewarding possibilities it offers.
This material is shared for educational insight, not for clinical decision-making. Information presented here is intended for general knowledge and should not be considered a substitute for professional advice or medical consultation. Individuals should consult with qualified healthcare professionals regarding any health concerns or before making any decisions related to their health or well-being. Always conduct thorough research and seek expert guidance when embarking on new practices, especially concerning health-related matters or mushroom cultivation for consumption.
FAQ
— How long does it take to grow maitake mushrooms?
The total time from inoculation to harvest can vary significantly, often spanning from several months to over a year. The initial colonization phase, where the mycelium spreads through the substrate, is the longest and most critical period. Fruiting occurs more rapidly once the mycelium is fully established and environmental triggers are introduced.
— What is the best wood for growing maitake?
Maitake thrives on dense hardwoods, with oak being a particularly effective choice due to its nutrient composition and slow decomposition rate. Other hardwoods like elm or maple are also suitable. The dense nature of these woods provides a sustained source of nutrition necessary for the mycelium to establish and eventually produce mushrooms.
— Can you cultivate maitake mushrooms indoors?
Yes, indoor cultivation is a common practice in commercial maitake mushroom farming, usually involving sterilized hardwood sawdust blocks in controlled-environment grow rooms. This method allows for precise management of temperature, humidity, and fresh air exchange, which are critical triggers for initiating the fruiting stage. Successfully recreating these specific environmental conditions is key to indoor production.
— Is maitake difficult to grow?
Maitake is generally considered one of the more challenging mushrooms for home cultivators compared to species like oyster mushrooms. Its mycelium colonizes substrate slowly, increasing the window of opportunity for contamination. The species also has very specific environmental requirements for fruiting, demanding patience and precise control from the grower.
— What is the best substrate for maitake?
The ideal substrate for maitake consists of hardwood-based materials that provide essential nutrients like cellulose and lignin. For outdoor log cultivation, oak is highly preferred, while indoor grows typically use a supplemented substrate of sterilized hardwood sawdust and bran. This nutrient-rich foundation is what the maitake mycelium consumes to gain the energy needed for growth and fruiting.
— How do you inoculate logs for maitake?
Inoculating logs involves introducing maitake mycelium, known as spawn, into the wood. Holes are drilled into a dormant hardwood log, filled with either sawdust or plug spawn, and then sealed with wax. This sealing process is vital as it protects the living mycelium from drying out and prevents competing fungi or bacteria from entering the inoculation points.
— What are common signs of contamination in a maitake grow?
Common indicators of contamination include the appearance of colors other than white, such as green, black, or orange patches, which often signal competing molds. A sour, foul, or vinegary smell is another key sign, usually pointing to bacterial growth within the substrate. Healthy maitake mycelium has a distinct white appearance and a pleasant, earthy scent.
— How often can you harvest from a single maitake log or block?
An inoculated log can potentially produce mushrooms for several years, typically fruiting once annually as the mycelium draws nutrients from the wood. Sterilized indoor blocks have a much shorter productive life, usually yielding one to three harvests, or “flushes,” over a period of a few months before the substrate is depleted. The total yield and number of flushes depend on the size and nutritional content of the substrate.
— What is the difference between maitake spawn and spores?
Spores are the microscopic, single-celled reproductive units of a mushroom, which must germinate and fuse to create a new mycelial network. Spawn, on the other hand, is a fully developed and vigorous network of mycelium that has been propagated onto a carrier material like grain or sawdust. Using spawn provides a significant head start in the cultivation process, as the mycelium is already established and ready to colonize a new substrate.