Embarking on the journey of cultivating your own gourmet fungi can be an immensely rewarding endeavor, offering fresh, delicious harvests right from your home. Mastering the art of mycology, particularly with resilient varieties like oyster mushrooms, opens up a world of culinary possibilities and sustainable practices. While it might seem daunting at first, understanding the fundamental principles and stages involved simplifies the process considerably. This comprehensive guide will illuminate precisely how to grow oyster mushrooms, detailing everything from selecting the right substrate to optimizing environmental conditions for prolific fruiting. We will walk you through each critical step, ensuring you gain the confidence and knowledge needed to achieve consistent, high-quality yields, transforming a hobby into a source of culinary delight.
Essential Materials and Environment Setup
To successfully grow oyster mushrooms, gathering the correct essential materials and setting up an appropriate environment are fundamental first steps. This preparatory stage lays the groundwork for healthy mycelium development and abundant fruiting. Attention to detail here significantly increases your chances of a successful harvest, minimizing issues like contamination or poor yields.
Choosing Your Oyster Mushroom Variety
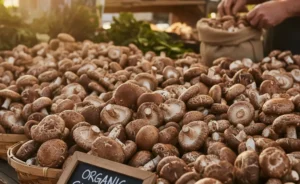
Oyster mushrooms encompass a diverse range of species, each with unique characteristics and cultivation requirements. Popular varieties for home growing include Pearl Oyster (Pleurotus ostreatus), which is robust and adaptable; Pink Oyster (Pleurotus djamor), known for its vibrant color and faster growth in warmer temperatures; Blue Oyster (Pleurotus ostreatus var. columbinus), appreciated for its beautiful blue-grey caps and preference for cooler conditions; and King Oyster (Pleurotus eryngii), which grows larger, thicker stems and requires slightly different conditions. Consider your local climate and desired growth speed when selecting your oyster mushroom variety.
Substrate Options for Home Cultivation
The substrate serves as the food source for your oyster mushrooms. Common and effective options for home cultivation include pasteurized straw, hardwood sawdust (often supplemented with soy hulls), coffee grounds, and even cardboard. Each substrate has its own advantages and preparation methods. Straw is readily available and easy to pasteurize, making it a popular choice for beginners. Sawdust offers a denser nutrient base, leading to potentially larger yields but often requires sterilization with a pressure cooker. Coffee grounds are a sustainable option, though they can be prone to contamination if not handled carefully. Proper substrate preparation, whether through pasteurization (heating below boiling to reduce competitor microbes) or sterilization (killing all microbes), is critical for success.
Tools for Preparation and Growth
A few key tools will make the oyster mushroom cultivation process smoother. You’ll need containers for your substrate and spawn, such as specialized mushroom grow bags, five-gallon buckets with drilled holes, or even clear plastic tubs. Sterilization equipment, like a large stock pot for pasteurization or a pressure cooker for sterilization, is essential for substrate preparation. A spray bottle for misting, a thermometer and hygrometer to monitor temperature and humidity, and gloves for maintaining hygiene during inoculation are also highly recommended. A clean work surface and isopropyl alcohol for sanitizing tools are indispensable.
Setting Up a Clean and Sterile Space
Maintaining cleanliness is paramount in mushroom cultivation to prevent contamination from competing molds and bacteria. Designate a clean, easy-to-sanitize area for your inoculation and substrate preparation. Wiping down all surfaces and tools with a disinfectant like isopropyl alcohol before beginning is crucial. For more advanced setups, a still air box (SAB) or a laminar flow hood can provide an even cleaner environment by minimizing airborne contaminants during sensitive steps like inoculating spawn or transferring mycelium. Always refer to reputable health resources, such as the NIH, for comprehensive health and safety information.
Maintaining Ideal Temperature and Humidity
Successful oyster mushroom cultivation hinges on providing the right environmental conditions throughout different stages. During the incubation phase, mycelium colonization typically thrives in warmer temperatures, usually ranging from 70-78°F (21-26°C), depending on the specific variety. Once colonization is complete and you move to the fruiting phase, a drop in temperature (often to 55-70°F or 13-21°C) combined with increased fresh air exchange and high humidity (85-95%) stimulates pinning and mushroom development. Misting with a spray bottle, using a humidifier in a grow tent, or employing a humidity-controlled chamber can help maintain these crucial moisture levels.
The Oyster Mushroom Cultivation Process
Understanding the detailed process is crucial to how to grow oyster mushrooms effectively from start to finish. From the microscopic spores to the delicious fruiting bodies, each stage requires specific attention and care to ensure a bountiful harvest.
Overview of the Oyster Mushroom Life Cycle
The oyster mushroom life cycle begins with spores, which germinate into thread-like structures called hyphae. These hyphae grow and branch, forming a network known as mycelium. Once the mycelium has fully colonized its food source (the substrate) and senses favorable environmental cues, it will begin to form primordia, also known as pins or tiny mushroom initials. These pins then develop rapidly into mature fruiting bodies, which are the edible oyster mushrooms we harvest. These mature mushrooms release new spores, completing the cycle.
Creating or Sourcing Grain Spawn
Grain spawn is essentially sterilized grain (like rye, wheat, or millet) inoculated with oyster mushroom mycelium. It acts as the “seed” for your mushroom project, allowing the mycelium to quickly colonize the larger substrate. You can create your own by sterilizing grains in a pressure cooker and then inoculating them with a liquid culture syringe or agar culture. Alternatively, many suppliers offer ready-to-use oyster mushroom spawn, which is a convenient option for beginners, ensuring you start with a vigorous and clean culture.
Inoculating Your Chosen Substrate
Inoculation is the process of introducing the grain spawn into your prepared substrate. For grow bags, you typically layer or mix the spawn with the pasteurized or sterilized substrate. When using buckets, spawn can be mixed thoroughly with the substrate before packing, or layered in alternating sections. The goal is to distribute the oyster mushroom spawn evenly throughout the substrate to ensure rapid and complete colonization, minimizing opportunities for contaminants to take hold. Work quickly and hygienically to prevent any unwanted microbes from entering your prepared substrate.
Monitoring Mycelium Development
After inoculation, the mycelium will begin to grow, spreading its white, cotton-like network through the substrate. This incubation phase requires stable temperatures and darkness. Regularly inspect your bags or containers, looking for uniform white growth. Healthy oyster mushroom mycelium typically appears bright white and vigorous. Colonization time varies depending on the mushroom variety, substrate, and environmental conditions, but usually takes several weeks. Avoid opening containers frequently during this phase to maintain a consistent environment and prevent contamination.
Identifying and Preventing Contamination
Contamination is a common challenge in mushroom cultivation. Green molds (like Trichoderma), black molds (Aspergillus), pink molds (Neurospora), and bacterial blotches are common culprits. Mold usually appears as fuzzy, colored patches, while bacteria can cause slimy, foul-smelling areas. Prevention is key: meticulous sterilization or pasteurization of your substrate, thorough cleaning of tools and workspaces, and high-quality, clean oyster mushroom spawn are your best defenses. If contamination occurs, it’s generally best to discard the affected substrate immediately to prevent spores from spreading to other projects.
Providing Optimal Fruiting Conditions
Once the substrate is fully colonized, it’s time to introduce fruiting conditions to trigger mushroom formation. This typically involves a “shock” or change in environment: a drop in temperature, exposure to light (indirect, ambient light is sufficient, not direct sunlight), and most importantly, increased fresh air exchange (FAE) and high humidity. FAE is crucial for oyster mushrooms, which produce a lot of carbon dioxide, and insufficient FAE can lead to leggy, deformed mushrooms. Creating small openings in grow bags or exposing parts of a bucket log will allow for FAE and promote pinning.
Caring for Growing Oyster Mushrooms
As the pins develop into full-sized oyster mushrooms, continued care is essential. Maintain high humidity by misting the mushrooms and the surrounding air several times a day, without directly soaking them. Ensure consistent fresh air exchange to prevent CO2 buildup, which can cause stunted growth or long stems with small caps. Monitor the temperature to keep it within the ideal range for your specific variety. Patience and consistency in these environmental controls will result in robust, healthy mushrooms.
Techniques for Successful Harvesting
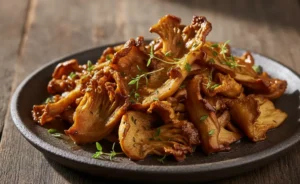
Knowing when and how to harvest your oyster mushrooms is important for maximizing yield and encouraging future flushes. Oyster mushrooms are typically ready for harvest when their caps begin to flatten out but before the edges start to curl upwards significantly or drop a dense layer of spores. To harvest, grasp the entire cluster at its base, close to the substrate, and twist or cut it off cleanly. Avoid leaving small remnants on the substrate, as these can rot and attract contaminants. Harvesting at the right time ensures optimal flavor and texture.
Encouraging Additional Mushroom Flushes
After the first harvest, your substrate often has enough nutrients and vitality for subsequent “flushes” of mushrooms. To encourage these, you might rehydrate the substrate by soaking the block in cold water for several hours (if using a solid block), or simply continue misting and maintaining fruiting conditions. Give the block a rest period of a week or two, then re-expose it to fruiting conditions. Later flushes may be smaller but still provide delicious mushrooms, extending your overall yield from a single substrate block.
Addressing Slow Growth or Poor Yields
If your oyster mushrooms are growing slowly or producing poor yields, troubleshoot your environmental conditions. Insufficient fresh air exchange is a common culprit, leading to leggy stems and small caps. Increase ventilation or fan the grow area more frequently. Low humidity can cause pins to dry out and abort, so ensure consistent misting or a more enclosed, humid environment. Temperature fluctuations or temperatures outside the ideal range can also stress the mycelium. Review your substrate preparation as well; improper pasteurization or sterilization can lead to competition and weak growth.
Growing Oyster Mushrooms: A Timeline
The timeline for growing oyster mushrooms can vary based on the variety, substrate, and environmental conditions. Generally, after inoculating the substrate, mycelium colonization takes approximately 10-21 days. Once fully colonized, initiating fruiting conditions can lead to pinning within 3-7 days. From pinning to mature harvest, it typically takes another 4-7 days. Subsequent flushes may appear 1-2 weeks after the previous harvest. This means you can often go from inoculation to first harvest in about 3-5 weeks, making oyster mushrooms a relatively fast-growing gourmet mushroom.
How to grow oyster mushrooms from store bought
You can propagate new oyster mushrooms from a store-bought mushroom using a technique called cloning. Select a fresh, healthy oyster mushroom from the grocery store. Tear (don’t cut) a piece from the inside of the stem, ensuring it hasn’t been exposed to air for too long. Place this tissue onto a sterile agar petri dish or into sterilized liquid culture. Once mycelial growth is evident, you can transfer this culture to grain spawn, and then proceed with regular substrate inoculation as described above. This DIY method allows you to expand your oyster mushroom collection from a successful strain you enjoy.
How to grow pink oyster mushrooms without plastic
Growing pink oyster mushrooms without plastic is achievable using alternative containers and methods. Instead of plastic grow bags, you can use natural materials like logs, though this is a longer-term outdoor project. For indoor cultivation, consider using sterilized glass jars, metal buckets, or reusable fabric grow bags (often made from breathable cloth). You can also construct wooden grow boxes or use terracotta pots with a humidity tent made from natural fibers. Ensure that whatever container you choose allows for proper fresh air exchange and can be effectively sterilized or pasteurized to prevent contamination.
Specific Growing Methods: Indoors, Outdoors, and for Profit
Exploring various techniques helps refine your approach to how to grow oyster mushrooms, whether for personal consumption or commercial purposes. Different settings present unique challenges and opportunities for cultivation.
Growing Oyster Mushrooms Indoors: Techniques and Considerations
Indoor cultivation of oyster mushrooms offers the most control over environmental factors, making it ideal for consistent production. Common techniques include using grow bags or buckets in a dedicated grow tent, a modified Martha tent, or a climate-controlled room. A grow tent with a humidifier, fan for fresh air exchange, and thermostat allows precise management of temperature, humidity, and airflow. The primary considerations for indoor growing are maintaining sanitation, providing adequate light (even indirect room light), and ensuring proper ventilation to prevent CO2 buildup, which can negatively impact mushroom formation and quality. Indoor setups are scalable, from small DIY kits to more elaborate systems for year-round harvesting.
Growing Oyster Mushrooms Outdoors: Considerations
Outdoor cultivation of oyster mushrooms typically involves inoculating logs, wood chips, or prepared garden beds. This method is more reliant on natural weather cycles and can be less controlled than indoor growing, but it can yield significant harvests with less initial setup cost. Key considerations include selecting the right type of hardwood logs (e.g., oak, maple) and inoculating them with spawn plugs or sawdust spawn. The logs then incubate for several months to over a year before fruiting. Outdoor growers must also consider protection from pests, slugs, and excessive sun or rain, as well as the seasonal availability of suitable temperatures and humidity. It’s a more patient approach but can integrate well with permaculture or garden systems.
Learn How to Grow Mushrooms in Buckets & Containers
Growing oyster mushrooms in buckets and other containers is a popular, scalable, and relatively simple DIY method, perfect for home growers. Five-gallon food-grade buckets are commonly used. Holes are drilled around the sides and bottom of the bucket to allow for fresh air exchange and mushroom pinning. The bucket is then packed with pasteurized substrate mixed with grain spawn. Once fully colonized, the bucket is moved to fruiting conditions. Other containers like laundry baskets lined with netting, plastic tubs, or even burlap sacks can also be adapted, provided they can hold the substrate, allow for drainage, and facilitate FAE. This method is excellent for managing several smaller batches and observing the growth process directly.
The journey of cultivating oyster mushrooms is a gratifying endeavor, merging the satisfaction of growing your own food with the fascinating world of mycology. By understanding the essential materials, mastering the cultivation process, and exploring various growing methods, you can consistently achieve abundant yields of these versatile and delicious gourmet fungi. Whether you choose a simple indoor setup or venture into outdoor log cultivation, the principles of hygiene, environmental control, and attentive observation will guide you to success. Embrace the process, learn from each flush, and enjoy the rich rewards of fresh, home-grown oyster mushrooms.
The content presented here is not a substitute for professional medical guidance. This guide offers general information for cultivating oyster mushrooms and is intended for educational purposes only. It is not meant to diagnose, treat, cure, or prevent any disease. Always consult with a qualified healthcare professional for personal medical advice. Individual results from mushroom cultivation may vary, and proper sanitation practices are crucial for food safety.
FAQ
— How long does it take to grow oyster mushrooms?
Oyster mushrooms are known for their relatively fast growth cycle, often ready for harvest within a few weeks. From the initial inoculation of the substrate, mycelial colonization typically takes about two to three weeks, followed by another five to ten days for the fruiting bodies to develop to maturity. Environmental conditions like temperature and humidity play a significant role in determining the exact timing of development.
— What is the best substrate for oyster mushrooms?
Oyster mushrooms are versatile and can thrive on various lignocellulosic materials, which serve as their food source. Common and highly effective substrates include straw, hardwood sawdust, coffee grounds, and even cardboard, providing essential nutrients for robust growth. The best substrate often depends on availability and the specific oyster mushroom strain, but many growers find straw and hardwood sawdust to yield excellent results due to their nutritional profile and structural integrity.
— Do oyster mushrooms need light to grow?
While mushrooms do not photosynthesize like plants, oyster mushrooms do require some light during their fruiting stage. Light cues them to form proper caps and stems, guiding their development and direction of growth. Indirect, ambient light—not direct sunlight—is sufficient to signal the mushrooms to fruit optimally and develop their characteristic shapes.
— Can you grow oyster mushrooms in a bucket?
Yes, growing oyster mushrooms in a bucket is a popular and effective method, especially for home cultivators. This technique involves filling a food-grade bucket with an inoculated substrate and drilling small holes around the sides for the mushrooms to fruit from. It offers a convenient and controlled environment for the mycelium to colonize before the mushrooms emerge.
— What do I need to start growing oyster mushrooms?
To begin learning how to grow oyster mushrooms, you primarily need a few key components. These include a suitable substrate material, inoculated grain spawn to introduce the mushroom culture, and a clean container like a bucket or specialized grow bag to house the substrate. Maintaining appropriate environmental conditions such as humidity and temperature will also be crucial for success.