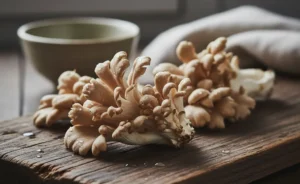
Many enthusiasts believe that the exquisite maitake mushroom, also known as Hen of the Woods, is a culinary delight reserved solely for dedicated foragers or highly experienced commercial growers. While its unique cluster formation and distinctive flavor have indeed made it a prized find in the wild, the reality is that cultivating Grifola frondosa in a home environment is far more accessible than often perceived. With the right knowledge and a methodical approach, even amateur cultivators can successfully learn how to grow maitake mushroom. This guide demystifies the process, providing practical steps and insights to help you cultivate these gourmet fungi right from your own space, transforming a seemingly complex endeavor into an achievable and rewarding project.
How to grow maitake mushroom: A Comprehensive Guide
Embarking on the journey of learning how to grow maitake mushroom requires an understanding of its unique biology and cultivation needs. Unlike some other common edible fungi, maitake has specific requirements regarding substrate, temperature, and humidity, which mimic its natural environment. This comprehensive guide will walk you through each stage, from initial inoculation to successful harvest, ensuring that even a novice can achieve rewarding yields. While maitake cultivation has its specifics, the principles are similar to growing other medicinal fungi like the reishi mushroom. Mastering these steps is key to unlocking the full potential of this gourmet fungus in your home setup.
Understanding Maitake Spores and Spawn
The foundation of any successful mushroom cultivation begins with understanding the reproductive materials: spores and spawn. Maitake spores are microscopic and analogous to plant seeds; they are the reproductive units that, under ideal conditions, germinate to form mycelium. However, for home cultivation, working directly with spores can be challenging due to their small size and the sterile conditions required for germination. This is where maitake spawn becomes invaluable. Spawn is essentially a substrate (like grain or sawdust) that has been colonized by healthy maitake mycelium. It acts as a starter culture, providing a robust and vigorous network of fungal cells ready to colonize a larger growing substrate, significantly increasing the chances of successful propagation compared to working from spores alone. Another popular method for propagation is using a maitake mushroom liquid culture, which can accelerate the colonization process.
Cultivating Hen of the Woods (Maitake) at Home
Cultivating Hen of the Woods, or maitake, at home can be a profoundly satisfying experience, offering a fresh supply of these coveted mushrooms. There are several popular methods available for home growers, each with its own advantages and learning curve. Whether you prefer the simplicity of a pre-made kit or the more traditional approach of using logs, understanding the core principles remains crucial. The principles of home cultivation can also be scaled up for those interested in maitake mushroom farming on a larger level. Successfully growing maitake mushrooms at home involves creating an environment that closely mimics their natural habitat, focusing on consistent conditions and careful monitoring.
Maitake Mushroom Growing Kits
For those new to mycology or seeking a less labor-intensive option, maitake mushroom growing kits present an excellent starting point. These kits typically come with a pre-inoculated substrate block, often sawdust-based, that is already colonized with maitake mycelium. The primary task for the cultivator is to initiate fruiting by providing the correct environmental triggers—usually a shock in temperature and an increase in humidity. While kits offer convenience and a relatively high success rate, it is important to follow the specific instructions provided by the kit manufacturer to ensure optimal results and learn how to grow maitake mushroom effectively from this method. Choosing a maitake mushroom grow kit from a reputable supplier can make a significant difference in your cultivation journey.
Growing Maitake Mushrooms on Logs
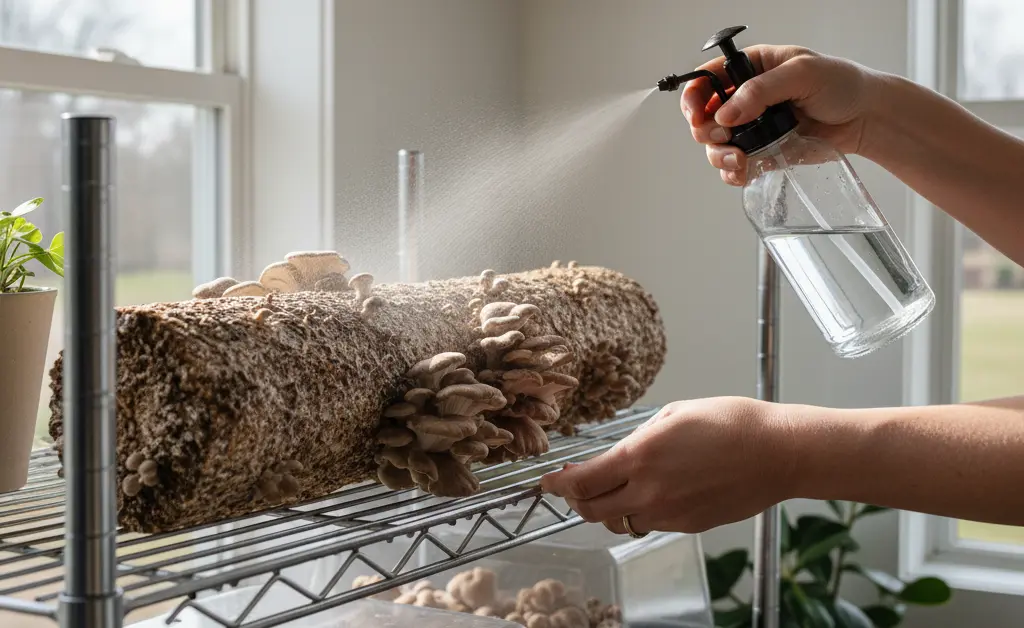
The traditional method of growing maitake mushrooms involves inoculating hardwood logs, a process that mirrors their natural growth habit in the wild. This method requires more patience and initial effort but can yield mushrooms for several years from a single log. Suitable hardwoods include oak, maple, and beech. Freshly cut logs are inoculated with maitake spawn plugs or sawdust spawn inserted into drilled holes. After inoculation, the logs are typically incubated in a shady, moist location, allowing the mycelium to fully colonize the wood over many months. Once colonized, the logs are encouraged to fruit through environmental cues, often by soaking or a natural drop in temperature. This approach is a cornerstone of sustainable maitake cultivation, and mastering the technique of growing maitake on logs can be very rewarding.
Essential Supplies for Maitake Cultivation
Before you begin the exciting process of how to grow maitake mushroom, gathering the necessary supplies is a critical first step. Having all your equipment ready and understanding the role of each component will streamline your cultivation efforts and contribute significantly to success. The right spawn and appropriate tools are foundational to creating an optimal environment for maitake mycelium to thrive and eventually produce edible mushrooms.
Choosing Maitake Spawn
The quality of your maitake spawn directly impacts the success of your cultivation project. Spawn comes in various forms, including grain spawn (often rye or millet), sawdust spawn, and plug spawn. Grain spawn is typically used for inoculating bulk substrates in indoor setups, offering rapid colonization due to its numerous inoculation points. Sawdust spawn is versatile, suitable for both bulk substrates and log inoculation, while plug spawn is specifically designed for drilling into logs. When selecting maitake spawn, always source it from a reputable supplier to ensure it is viable, contaminant-free, and genetically robust. A healthy, vigorous spawn culture is paramount for strong mycelial growth and subsequent mushroom production.
Essential Equipment for Home Growing
For home growing of maitake, several pieces of equipment are essential to maintain the controlled environment these fungi require. Key items include a pressure cooker or sterilizer for preparing substrates, sterile gloves, face masks, and a clean working area (ideally a still air box or flow hood) to minimize contamination during inoculation. You’ll also need containers for your substrate blocks (such as grow bags or specialized fruiting blocks), a hygrometer/thermometer to monitor humidity and temperature, and a humidifier or misting bottle to maintain optimal moisture levels. Good air circulation is also important, so a small fan might be beneficial, especially in a fruiting chamber setup. These tools collectively help create and maintain the precise conditions for successful maitake cultivation.
Preparing the Growing Substrate
The substrate serves as the food source for your maitake mycelium, and its proper preparation is crucial for a successful harvest. A well-prepared substrate provides the necessary nutrients and structure for the mycelium to grow robustly, ultimately leading to healthy mushroom development. Understanding the best substrate mix and mastering sterilization and inoculation techniques are fundamental steps in learning how to grow maitake mushroom efficiently.
Selecting the Best Substrate Mix
Maitake mushrooms thrive on lignin-rich substrates, mimicking the hardwood trees they naturally colonize. The best substrate mix for maitake typically consists of a combination of hardwood sawdust (oak, maple, or beech are ideal) supplemented with nutritional additives. Common supplements include wheat bran, rice bran, or soy hulls, which provide essential nitrogen and other nutrients to fuel mycelial growth. Gypsum is also often added to regulate pH and provide mineral content. A typical ratio might involve a high percentage of hardwood sawdust, a smaller percentage of bran, and a touch of gypsum, mixed with water to achieve the correct moisture content. This blend ensures a balanced diet for the growing mycelium.
Sterilization and Inoculation Steps
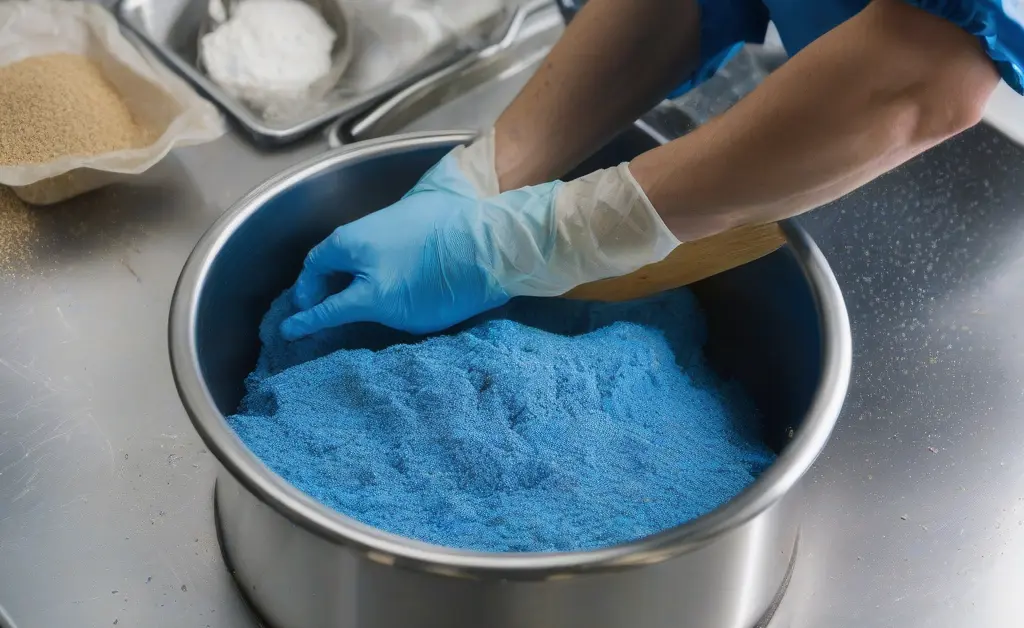
Sterilization is a non-negotiable step in maitake cultivation, as it eliminates competing microorganisms that could contaminate your substrate and outcompete the maitake mycelium. Substrates are typically sterilized using a pressure cooker or steam sterilizer, heating them to temperatures that kill off bacteria, molds, and other fungi. After sterilization, the substrate must cool completely before inoculation. Inoculation is the process of introducing your maitake spawn into the sterile substrate. This step must be performed in a clean, sterile environment, such as within a still air box or in front of a laminar flow hood, to prevent airborne contaminants from entering the substrate. Carefully crumble the spawn into the cooled substrate, ensuring even distribution for thorough colonization.
Maitake Mycelium Colonization & Incubation
Once your substrate has been inoculated, the maitake mycelium begins its crucial colonization phase. This is a period of vegetative growth where the fungal network spreads throughout its food source, converting nutrients into the energy needed for future mushroom production. Proper management during this incubation period is vital for robust mycelial growth and successful fruiting. Understanding the specific needs of maitake during this stage is essential for a rewarding outcome.
Substrate Blocks for Fruiting
After inoculation, the colonized substrate is often referred to as a substrate block. These blocks serve as the foundation from which maitake mushrooms will eventually emerge. During the colonization phase, the mycelium binds the substrate particles together, forming a solid, cohesive block. This block needs to be carefully maintained in its incubation environment until it is fully colonized, meaning the white, cottony mycelium has spread throughout the entire block, leaving no uncolonized areas. A fully colonized block indicates a strong and healthy mycelial network, ready to transition to the fruiting stage.
Ideal Colonizing Temperatures
Maitake mycelium has specific temperature preferences for optimal colonization. Generally, a consistent temperature range that is neither too hot nor too cold is ideal for vigorous growth. Maintaining stable temperatures during this phase prevents thermal shock and encourages the mycelium to spread uniformly and efficiently throughout the substrate. Fluctuations in temperature can slow down colonization or, worse, create opportunities for competing molds to gain a foothold. Monitoring the ambient temperature of your incubation area closely is therefore a key aspect of successful maitake cultivation.
Monitoring the Incubation Period
The incubation period for maitake can vary depending on the substrate type, spawn vigor, and environmental conditions. During this time, regular monitoring is essential, though minimizing disturbance is also important. Observe the substrate blocks for signs of healthy mycelial growth—a dense, white, filamentous network spreading across and through the substrate. Conversely, watch out for any signs of contamination, such as green, black, or orange patches (molds) or unusual odors, which indicate bacterial growth. A healthy, fully colonized block will eventually turn entirely white and may start to show small, dense knots of mycelium, signaling its readiness for the fruiting stage. Patience and careful observation are virtues during this phase.
Initiating and Maintaining Maitake Fruiting Conditions
The transition from a fully colonized substrate block to the actual production of mushrooms, known as fruiting, is a delicate stage that requires precise environmental adjustments. Maitake mushrooms need specific triggers to initiate pin formation and subsequent development. Mastering these conditions is paramount to successfully learning how to grow maitake mushroom and harvesting bountiful clusters. Understanding the ideal maitake mushroom growing conditions is the key to success at this stage.
Adjusting Temperature for Fruiting
To initiate fruiting, maitake typically requires a drop in temperature, often referred to as a “cold shock,” mimicking the seasonal changes it experiences in nature. This temperature shift signals to the mycelium that it’s time to produce mushrooms before colder weather sets in. After this initial shock, a stable, cooler temperature range is maintained for optimal development of the fruiting bodies. Consistent temperature control throughout the fruiting period helps ensure steady growth and prevents aborts or malformed mushrooms. Careful monitoring with a thermometer is crucial to maintain this precise environment.
Maintaining Proper Humidity Levels
High humidity is absolutely critical for the formation and development of maitake mushrooms. The air surrounding the developing pins and growing clusters must be kept consistently moist to prevent them from drying out and to support their cellular expansion. Maitake fruiting chambers often require humidity levels to be elevated, which can be achieved through various methods such as humidifiers, misting systems, or simply by maintaining a humid environment within a Martha tent or similar enclosure. Without adequate humidity, pins may fail to develop or fully formed mushrooms can become dry and leathery, impacting both yield and quality.
Ensuring Adequate Fresh Air Exchange
While high humidity is vital, maitake also requires ample fresh air exchange (FAE) during the fruiting phase. Mycelium, and especially developing mushrooms, consume oxygen and release carbon dioxide. If carbon dioxide levels become too high, it can lead to leggy, elongated stems and underdeveloped caps, a condition known as “fuzzy feet” or simply poor morphology. Regular air exchange, often achieved through passive vents or small fans, helps to remove stale, CO2-rich air and introduce fresh oxygen, promoting healthy, well-formed mushroom clusters. Balancing high humidity with sufficient FAE is a key challenge in maitake cultivation, but essential for successful harvests.
Harvesting Your Maitake Mushrooms
Reaching the harvesting stage is the culmination of your efforts in cultivating maitake mushrooms. Knowing precisely when and how to harvest ensures you gather the mushrooms at their peak quality, maximizing flavor and shelf life. This final step is as important as any in the journey of how to grow maitake mushroom.
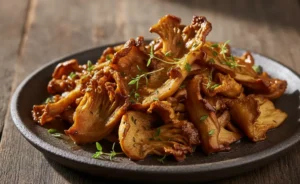
Identifying the Right Time to Harvest
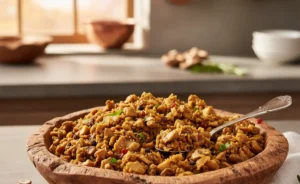
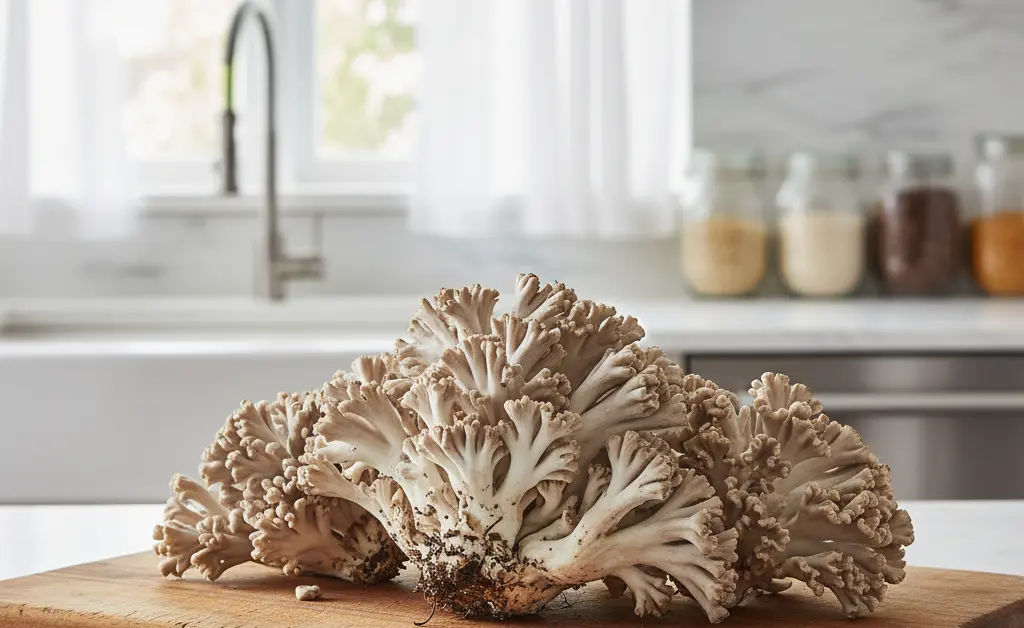
Identifying the optimal time to harvest maitake mushrooms is crucial for both taste and texture. Maitake clusters typically grow as dense, multi-lobed structures, resembling a “hen of the woods” or a cauliflower. Look for signs of maturity: the individual caps within the cluster should be well-formed, somewhat firm, and the edges should still appear relatively smooth, not curled upwards or dried out. While there’s a window for harvesting, picking them before they release a significant amount of spores (which can create a mess and sometimes affect texture) is generally preferred. Overripe maitake can become tough or powdery, losing its delicate flavor and texture. In addition to its culinary value, its potential health benefits are an area of active study, with information available from sources like the NIH.
Proper Harvesting Techniques
To harvest maitake mushrooms, use a clean, sharp knife to cut the entire cluster at its base, where it attaches to the substrate block or log. Try to make a single, clean cut to minimize damage to the block, which can encourage subsequent flushes. Handle the cluster gently to avoid bruising the delicate caps. Once harvested, you can clean off any substrate debris from the base of the cluster. Depending on the cultivation method and conditions, your maitake block or log may produce additional “flushes” of mushrooms over time, making proper harvesting techniques important for future yields.
Common Challenges in Maitake Cultivation
Even with meticulous planning, cultivating maitake mushrooms can present various challenges. Addressing these issues proactively is key to a successful harvest and gaining proficiency in how to grow maitake mushroom. Understanding common problems and their solutions will help you navigate potential setbacks and refine your cultivation techniques.
Identifying and Managing Contamination
Contamination is arguably the most common and disheartening challenge in mushroom cultivation. It occurs when unwanted molds, bacteria, or other fungi colonize your substrate before or alongside your maitake mycelium. Common contaminants appear as green (Trichoderma), black (Aspergillus), pink, or orange patches, or they may produce foul, sour odors. Prevention is the best strategy: rigorously sterilize your substrate, maintain a sterile inoculation environment, and use clean, healthy spawn. If contamination is detected early in a substrate block, it may sometimes be isolated, but often the entire block must be discarded to prevent the spread of spores to other projects, particularly in a home setup.
Troubleshooting Slow Mycelial Growth
Slow or stalled mycelial growth can be frustrating. Several factors can contribute to this, including insufficient colonization temperatures, improper substrate moisture content (either too wet or too dry), or weak/old spawn. If your mycelium is growing slowly, first verify that your incubation temperatures are within the optimal range for maitake. Next, check the moisture content of your substrate; it should be moist but not waterlogged. Ensure your spawn was fresh and vigorous. Sometimes, simply giving it more time in stable, ideal conditions can resolve the issue, but persistent slowness might indicate a fundamental problem with the spawn or substrate preparation.
Addressing Fruiting Pin Failures
Fruiting pin failures, where tiny mushroom primordia (pins) form but then stop growing or abort, are another common setback. This usually indicates that the environmental conditions for fruiting are not optimal. Common culprits include insufficient humidity, inadequate fresh air exchange, or incorrect fruiting temperatures. Pins require a very humid environment to develop, so ensure your fruiting chamber maintains consistently high humidity. Poor air exchange can lead to high CO2 levels, causing pins to abort. Lastly, ensure the temperature is appropriate for fruiting, as fluctuations or extremes can stress the developing mushrooms. Adjusting these parameters carefully can often revive a stalled flush and encourage healthy development.
Cultivating maitake mushrooms, while requiring attention to detail, is an incredibly rewarding endeavor for any home grower. By understanding the lifecycle of this unique fungus, carefully preparing your substrate, maintaining precise environmental conditions, and troubleshooting common issues, you can successfully learn how to grow maitake mushroom right in your own space. The satisfaction of harvesting your own gourmet Hen of the Woods is a culinary delight and a testament to your cultivation skills.
The content presented here is not a substitute for professional medical guidance. It is intended for informational and educational purposes only regarding mushroom cultivation. Always consult with qualified professionals for any health concerns or before making decisions related to your well-being. This information does not provide medical advice, diagnoses, or prescriptions.
FAQ
— How long does it take to grow Maitake mushrooms?
The cultivation cycle for Maitake is considerably longer than for many other gourmet mushrooms. The initial colonization phase, where the mycelium fully grows through the substrate, can take one to two months. After this, initiating fruiting and waiting for the mushroom clusters to mature can take several more weeks.
— What is the best substrate for growing Maitake at home?
Maitake mushrooms naturally grow on hardwood trees, so substrates made from hardwood sawdust and chips are ideal for home cultivation. These materials are often supplemented with a nitrogen-rich source like wheat bran or oat bran. This enrichment provides the necessary nutrients for robust mycelial growth and eventual fruiting.
— What temperature and humidity do Maitake mushrooms need to fruit?
To initiate fruiting, Maitake requires a shift to cooler temperatures, typically in a specific range that mimics the onset of autumn. High humidity is also critical throughout the pinning and fruit body development stages. These environmental triggers signal to the mycelium that it is the right time to produce mushrooms.
— Can you grow Maitake mushrooms indoors?
Growing Maitake indoors is entirely possible and is the standard method for consistent cultivation. An indoor environment allows a grower to precisely manage the specific temperature, humidity, and fresh air exchange needed to trigger fruiting. This level of control is key to successfully cultivating this particular species.
— Can you grow Hen of the Woods at home?
Yes, Hen of the Woods can be cultivated at home, as this is the common name for the mushroom *Grifola frondosa*, or Maitake. While it requires patience and attention to specific growing conditions, it is a rewarding species for dedicated home growers. The process follows the same principles as cultivating other wood-loving mushrooms.
— Is Maitake a difficult mushroom to cultivate?
Maitake is generally considered an intermediate-to-advanced species for home cultivators. Its long colonization period makes it more susceptible to contamination, and its fruiting requirements are more precise than those for beginner-friendly mushrooms. Learning how to grow maitake mushroom involves a greater degree of patience and environmental control.
— How many harvests can you get from a Maitake block?
A single, substantial harvest is typical from one Maitake substrate block. While some other mushroom species reliably produce multiple “flushes,” Maitake directs most of its energy into its first fruiting. Subsequent harvests are possible but are often significantly smaller and less dependable.