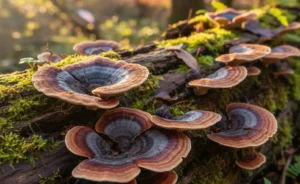
Growing your own turkey tail mushrooms at home can be a rewarding experience, offering both fresh specimens and a fascinating insight into mycology. These distinctive fungi, known for their vibrant, fan-like appearance and historical use, are increasingly popular among enthusiasts. While foraging is one option, utilizing a turkey tail mushroom grow kit provides a controlled and accessible method for cultivation. This guide will walk you through everything from selecting the right kit and preparing your environment to activating it, maintaining optimal conditions, and troubleshooting common issues. With the proper approach, you can successfully cultivate these beneficial mushrooms, enjoying the process and the harvest.
Understanding Turkey Tail Mushroom Grow Kits
A turkey tail mushroom grow kit simplifies the process of cultivating these unique polypore fungi in a home setting. Designed for ease of use, these kits typically arrive pre-inoculated, meaning the initial stage of mycelial colonization has already taken place. This foundational preparation allows cultivators to bypass the more complex steps of spore inoculation and sterile substrate preparation, making mushroom growing accessible to beginners and experienced growers alike. Understanding what constitutes a typical kit and the various types available is the first step toward successful cultivation.
Components of a Typical Grow Kit
Most turkey tail mushroom grow kits are carefully assembled to provide everything necessary for the mycelium to develop into fruiting bodies. Key components generally include:
- Substrate: This is the nutritional base where the turkey tail mycelium lives and derives its sustenance. Common substrates for wood-loving fungi like Turkey Tail include sterilized hardwood sawdust, wood chips, or logs, often supplemented with bran or other nutrients.
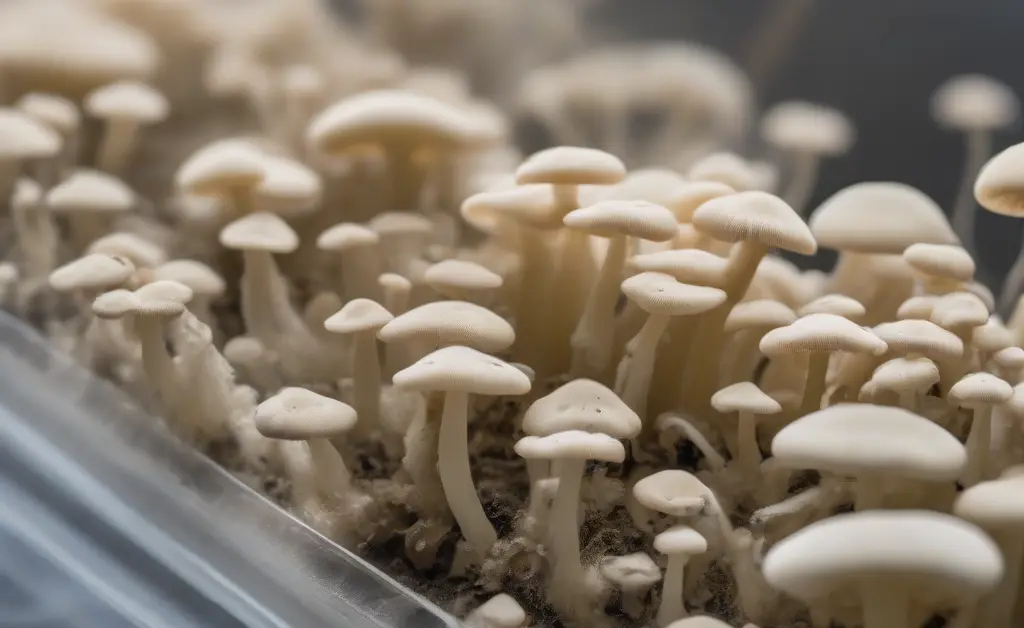
- Mycelium: The vegetative part of the fungus, which appears as a network of fine white threads, is already growing within the substrate. This living organism is what will eventually produce the mushrooms.
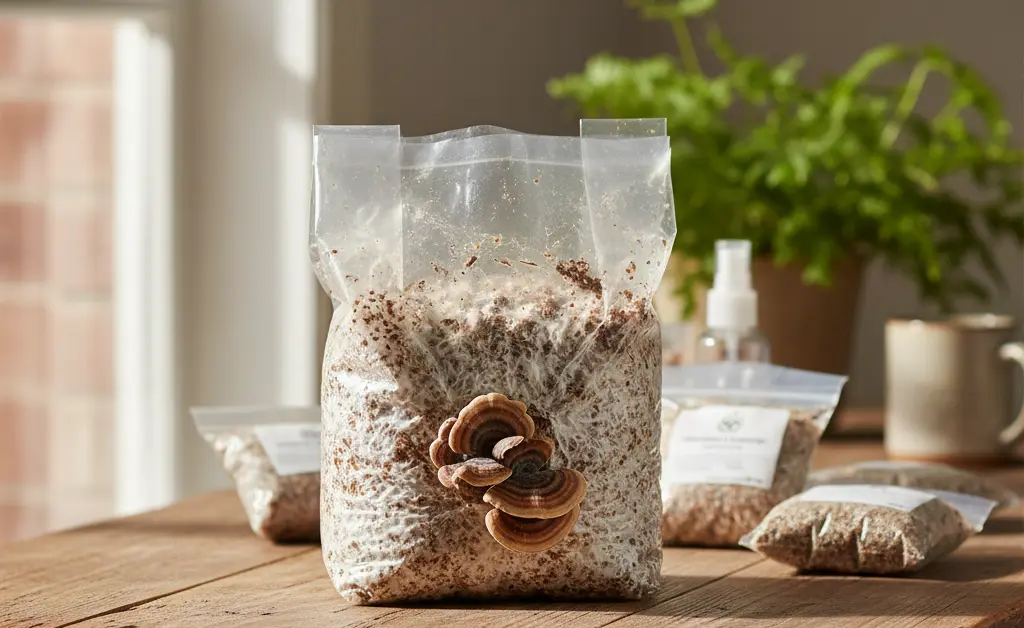
- Fruiting Block: The combined substrate and mycelium form a solid block, often contained within a specialized filter patch bag that allows for gas exchange while preventing contamination.
- Instructions: Comprehensive guidelines on how to activate, care for, and harvest your mushrooms are almost always included, providing essential information for a successful yield.
- Misting Bottle (Optional): Some kits may include a small misting bottle to help maintain the necessary humidity levels during the fruiting phase.
Types and Sizes of Kits: Log, Bag, Other Varieties
Turkey Tail mushroom grow kits come in several forms, each suited to different preferences and growing environments:
- Sawdust Block Kits (Bag Kits): These are perhaps the most common type. They consist of a compressed block of sterilized sawdust or a similar woody substrate, fully colonized with turkey tail mycelium, sealed in a plastic bag with a filter patch. These kits are generally easy to activate and are ideal for indoor cultivation, often producing multiple flushes of mushrooms. For those cultivating in Europe, a specific turkey tail mushroom grow kit UK may offer suitable varieties.
- Log Kits: For a more natural and long-term cultivation project, log kits are an excellent choice. These involve hardwood logs (like oak or maple) that have been inoculated with turkey tail mushroom spores or plug spawn. While they take longer to colonize and fruit, they can continue to produce mushrooms for several years outdoors once established.
- Plug Spawn or Dowel Kits: These kits provide inoculated wooden dowels that growers can insert into freshly cut hardwood logs. This option offers a DIY approach to log cultivation, requiring more hands-on effort in preparing the logs but allowing for greater scale.
Choosing the Best Turkey Tail Mushroom Grow Kit
Selecting a high-quality turkey tail mushroom grow kit is crucial for a successful and rewarding cultivation experience. With various options available, knowing what distinguishes an excellent kit from a subpar one can significantly impact your yield and the overall health of your turkey tail fungi. Thoughtful consideration of a kit’s characteristics and the reputation of its supplier will set you on the path to successful home mycology. For further research on medicinal fungi, information can be found through resources like NIH.
What to Look for in a Quality Kit
When evaluating potential turkey tail mushroom grow kits, several factors indicate quality and reliability:
- Vigorous Mycelium: A healthy kit should show robust, white mycelial growth throughout the substrate. Avoid kits with signs of green, black, or unusual discoloration, which may indicate contamination.
- Sterilized Substrate: The substrate should be properly sterilized to prevent the growth of competing fungi or bacteria. High-quality kits use a carefully prepared substrate, often hardwood sawdust, that is ideal for Turkey Tail.
- Clear and Comprehensive Instructions: Good kits come with detailed, easy-to-understand instructions. These should cover everything from activation and environmental preparation to misting schedules and harvesting tips.
- Reputable Supplier: Choose kits from suppliers known for their expertise in mycology and commitment to quality. Established growers often offer better support and more reliable products.
- Organic and Sustainable Sourcing: For those concerned about environmental impact, look for kits that use organically sourced substrates and sustainable cultivation practices.
Evaluating Kit Quality and Reviews
Before purchasing your turkey tail mushroom grow kit, take the time to research and evaluate its quality. Customer reviews are an invaluable resource for this process. Look for:
- Consistent Positive Feedback: Many positive reviews regarding ease of use, growth rates, and harvest yield are good indicators. Pay attention to comments about the overall experience and the health of the mushrooms produced.
- Photos from Other Growers: Review photos shared by other customers can provide visual confirmation of the kit’s performance and the quality of the turkey tail it produces.
- Customer Support: A good supplier will offer responsive customer support to help with any questions or issues that may arise during your cultivation journey. Check if previous customers mention positive interactions with support.
- Yield Expectations: While specific yields can vary, reviews often give a general idea of what to expect in terms of mushroom quantity and repeat flushes. Cultivators in Australia can also find specialized turkey tail mushroom kit Australia options tailored to local conditions.
How to Use Your Turkey Tail Grow Kit
Successfully cultivating turkey tail mushrooms from a grow kit involves several key stages, from preparing the right environment to carefully monitoring growth and knowing when to harvest. Each step is crucial for encouraging healthy mycelial development and the emergence of vibrant fruiting bodies. Following the instructions provided with your turkey tail mushroom grow kit precisely will yield the best results.
Preparing Your Growing Environment
Creating an optimal environment is paramount for encouraging your turkey tail to flourish. These fungi thrive in conditions that mimic their natural habitat. Key environmental factors include:
- Temperature: Maintain a consistent temperature. Turkey Tail generally prefers cooler temperatures, often thriving in a range that is comfortable for most indoor living spaces. Avoid extreme heat or cold.
- Humidity: High humidity is critical for mushroom formation and growth. A fruiting chamber, a humidity tent, or regular misting can help maintain the necessary moisture levels around your kit.
- Light: While not essential for nutrition (as mushrooms don’t photosynthesize), indirect light signals to the mycelium that it’s time to fruit and helps orient growth. Avoid direct sunlight, which can dry out the kit.
- Ventilation: Fresh air exchange is important to prevent CO2 buildup, which can inhibit proper mushroom formation. Ensure good air circulation without drying out the kit.
- Location: Choose a clean, stable location indoors, away from direct drafts, heating vents, or direct sunlight. A kitchen counter or a shelf in a well-ventilated room can be suitable.
Activating Your Grow Kit
Activating your kit typically involves a few simple steps to initiate the fruiting process:
- Read Instructions: Always start by thoroughly reading the specific instructions that came with your turkey tail mushroom grow kit, as procedures can vary slightly between brands.
- Prepare the Block: This often involves making a cut or opening in the plastic bag where you want the mushrooms to emerge. Some kits may require you to remove the block from its packaging entirely.
- Initiate Fruiting: Sometimes, a “shock” such as a brief cold water bath or a period in cooler temperatures is recommended to trigger fruiting. This simulates natural environmental changes that signal the start of the growing season.
- Placement: Place the activated block in your prepared high-humidity environment.
Maintaining Optimal Growing Conditions
Once activated, consistent care is essential:
- Misting: Regularly mist the exposed surface of the block and the surrounding air to maintain high humidity. The surface of the block should appear moist, but not soaking wet.
- Humidity Monitoring: Use a hygrometer to monitor humidity levels. Aim for a consistently high percentage.
- Temperature Control: Keep the ambient temperature within the recommended range.
- Fresh Air Exchange: Ensure the grow area receives regular fresh air. If using a humidity tent, air it out periodically.
Expected Growth Timeline
The timeline for turkey tail mushroom growth can vary based on environmental conditions and the specific kit. Generally, after activation, you might see the first signs of tiny mushroom pins (primordia) appearing within a week or two. These will gradually expand and develop into the characteristic fan-like structures. Full maturity can take several weeks from the appearance of primordia. Remember that patience is key in the cultivation process.
When to Harvest Turkey Tail Mushrooms
Harvesting at the right time ensures the best quality and can encourage repeat flushes. Turkey Tail mushrooms are typically ready for harvest when:
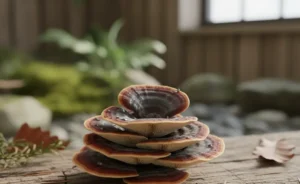
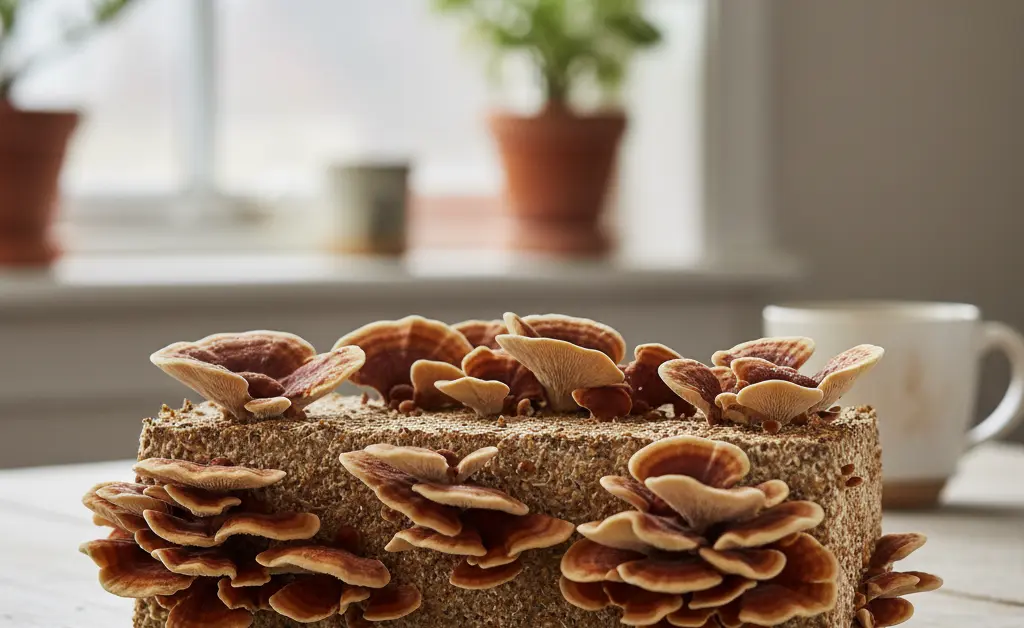
- Their caps have fully expanded and flattened out, forming distinct fan-like or shelf-like shapes.
- The vibrant concentric rings of color (browns, grays, oranges, blues) are clearly visible and well-defined.
- The underside (pore surface) is white or light in color.
- The edges of the mushroom are still growing, but the overall structure feels firm and healthy.
To harvest, gently twist or cut the mushrooms at their base, being careful not to damage the underlying mycelium, which can produce subsequent flushes.
Troubleshooting Common Grow Kit Issues
Even with the best intentions and a quality turkey tail mushroom grow kit, challenges can arise during cultivation. Understanding common issues like a lack of growth or the presence of contamination, and knowing how to address them, can help you salvage your project and ensure a successful harvest. Proactive measures and careful observation are your best tools for managing these problems.
Addressing Lack of Growth
- Incorrect Environment:
- Low Humidity: The most common reason for stalled growth. Ensure consistent high humidity through misting or a humidified fruiting chamber.
- Inconsistent Temperature: Check that your growing area maintains the recommended temperature range. Fluctuations can stress the mycelium.
- Insufficient Fresh Air Exchange: Too much CO2 can prevent pinning. Increase ventilation without drying out the kit.
- Lack of Light: Ensure the kit receives ambient indirect light to signal fruiting.
- Dormant Mycelium: Sometimes, the mycelium needs an additional “shock” to initiate fruiting. Re-read your kit’s instructions for any recommended cold-shocking methods if growth remains stagnant after initial activation.
- Damaged Mycelium: Rough handling or extreme conditions prior to or during activation could have damaged the mycelium. While difficult to remedy, future kits should be handled with care.
- Kit Expiration: Mycelium has a shelf life. Ensure your kit is fresh and within its recommended use-by date.
Identifying and Preventing Contamination
Contamination is a common hurdle in mushroom cultivation, appearing as unwanted molds or bacteria competing with your turkey tail. Early identification and prevention are key:
- Common Contaminants:
- Green Mold (Trichoderma): Appears as fuzzy green patches, often starting small and spreading rapidly.
- Black Mold (Aspergillus): Dark, sooty-looking patches.
- Pink/Orange Mold (Neurospora): Cottony, vibrant pink or orange growth.
- Bacterial Blotch: Slimy, discolored patches, often yellow or brown.
- Prevention Strategies:
- Sterile Environment: While grow kits are designed to be relatively contamination-resistant, always work in a clean area when activating or handling the kit. Wash your hands thoroughly.
- Clean Water: Use purified or distilled water for misting to avoid introducing contaminants.
- Proper Ventilation: Stagnant, humid air can encourage mold growth. Ensure good air circulation.
- Avoid Over-Misting: While humidity is crucial, excessive water pooling on the substrate can create anaerobic conditions favoring bacterial growth.
- Isolate Contaminated Kits: If you identify contamination, immediately isolate the affected kit to prevent spores from spreading to other growing projects. Unfortunately, heavily contaminated kits are often unsalvageable and should be discarded to protect other healthy mycelium.
This content is for informational use and should not be considered medical instruction. It is important to consult with a qualified healthcare professional before making any decisions about your health, diet, or lifestyle. The information provided here is not intended to diagnose, treat, cure, or prevent any disease. Always seek professional medical advice for any health concerns.
FAQ
— How long does it take for turkey tail mushrooms to grow from a kit?
From activation, you can typically see the first signs of turkey tail mushroom growth within 7-14 days. Full maturity, ready for harvest, often takes an additional 1-2 weeks after that initial appearance. This timeline can vary slightly depending on environmental conditions like humidity and temperature.
— What is the best way to activate a turkey tail mushroom grow kit?
Activating a kit typically involves creating the right microclimate, often by increasing humidity around the block. Many kits suggest a simple method like placing the block in a humidity tent or misting it regularly after making an initial cut in the bag. This provides the environmental signal for the mycelium to begin fruiting.
— Can I grow turkey tail mushrooms indoors?
Yes, turkey tail mushrooms are quite amenable to indoor cultivation using a grow kit. The key is to replicate their natural forest environment by providing consistent humidity, adequate fresh air exchange, and indirect light. Indoor growing allows for better control over these crucial environmental factors.
— How many times can I harvest from a turkey tail grow kit?
Most turkey tail mushroom grow kits are designed to produce multiple flushes of mushrooms. After the first harvest, with proper rehydration and care, you can often expect 2-3 additional flushes, though subsequent harvests may yield slightly less. Each flush requires a period of rest and re-establishing optimal humidity levels.
— What temperature is best for growing turkey tail mushrooms?
Turkey tail mushrooms thrive in moderate temperatures, generally preferring a range between 60-75°F (15-24°C) for optimal fruiting. Maintaining a stable temperature within this range helps encourage consistent growth and development of the fungal bodies. Fluctuations outside this comfort zone can stress the mycelium and impact yields.
— Where can I buy a reliable turkey tail mushroom grow kit?
You can find reliable turkey tail mushroom grow kit products from specialized mycological suppliers or reputable online retailers that focus on mushroom cultivation. When selecting one, look for kits that provide clear instructions and come from a vendor known for quality and fresh substrate. Prioritizing suppliers with good customer reviews and support is also a sensible approach.
— What kind of light do turkey tail mushrooms need to grow?
Turkey tail mushrooms require light to develop their characteristic form and coloration, though they don’t need direct sunlight. Indirect, ambient light, similar to what they would receive on a forest floor, is perfectly sufficient. A common household light source or even indirect window light can fulfill this requirement for indoor growing.